
A do-it-yourself artist taboret I made by recycling a thrift store bedside stand.
This post is a long time coming, but since I didn’t make any promises out loud, who cares, right? :)
The story starts late last year, when I was brainstorming on ideas for Christmas presents for the resident teen.
Those of you who know me know she’s planning a career in the visual arts. So art-related gifts are always a good fall-back.
In this case, however, what she needed was not more supplies, but a better work space (and more storage wouldn’t hurt, either). So I started hunting around for some sort of cabinet, and that led me to the idea of getting her an artist taboret.
Unfortunately, the choices seemed to fall into one of two categories: either very low quality/poorly designed or OMG-you-must-be-kidding-me expensive. Then, in early December, I hit on an idea: what if I could find a used night stand/bedside table and convert it into a taboret?
And that’s what I did, and — for the benefit of other artists out there who want a terrific but low-cost taboret — here’s how I did it.
The Nightstand
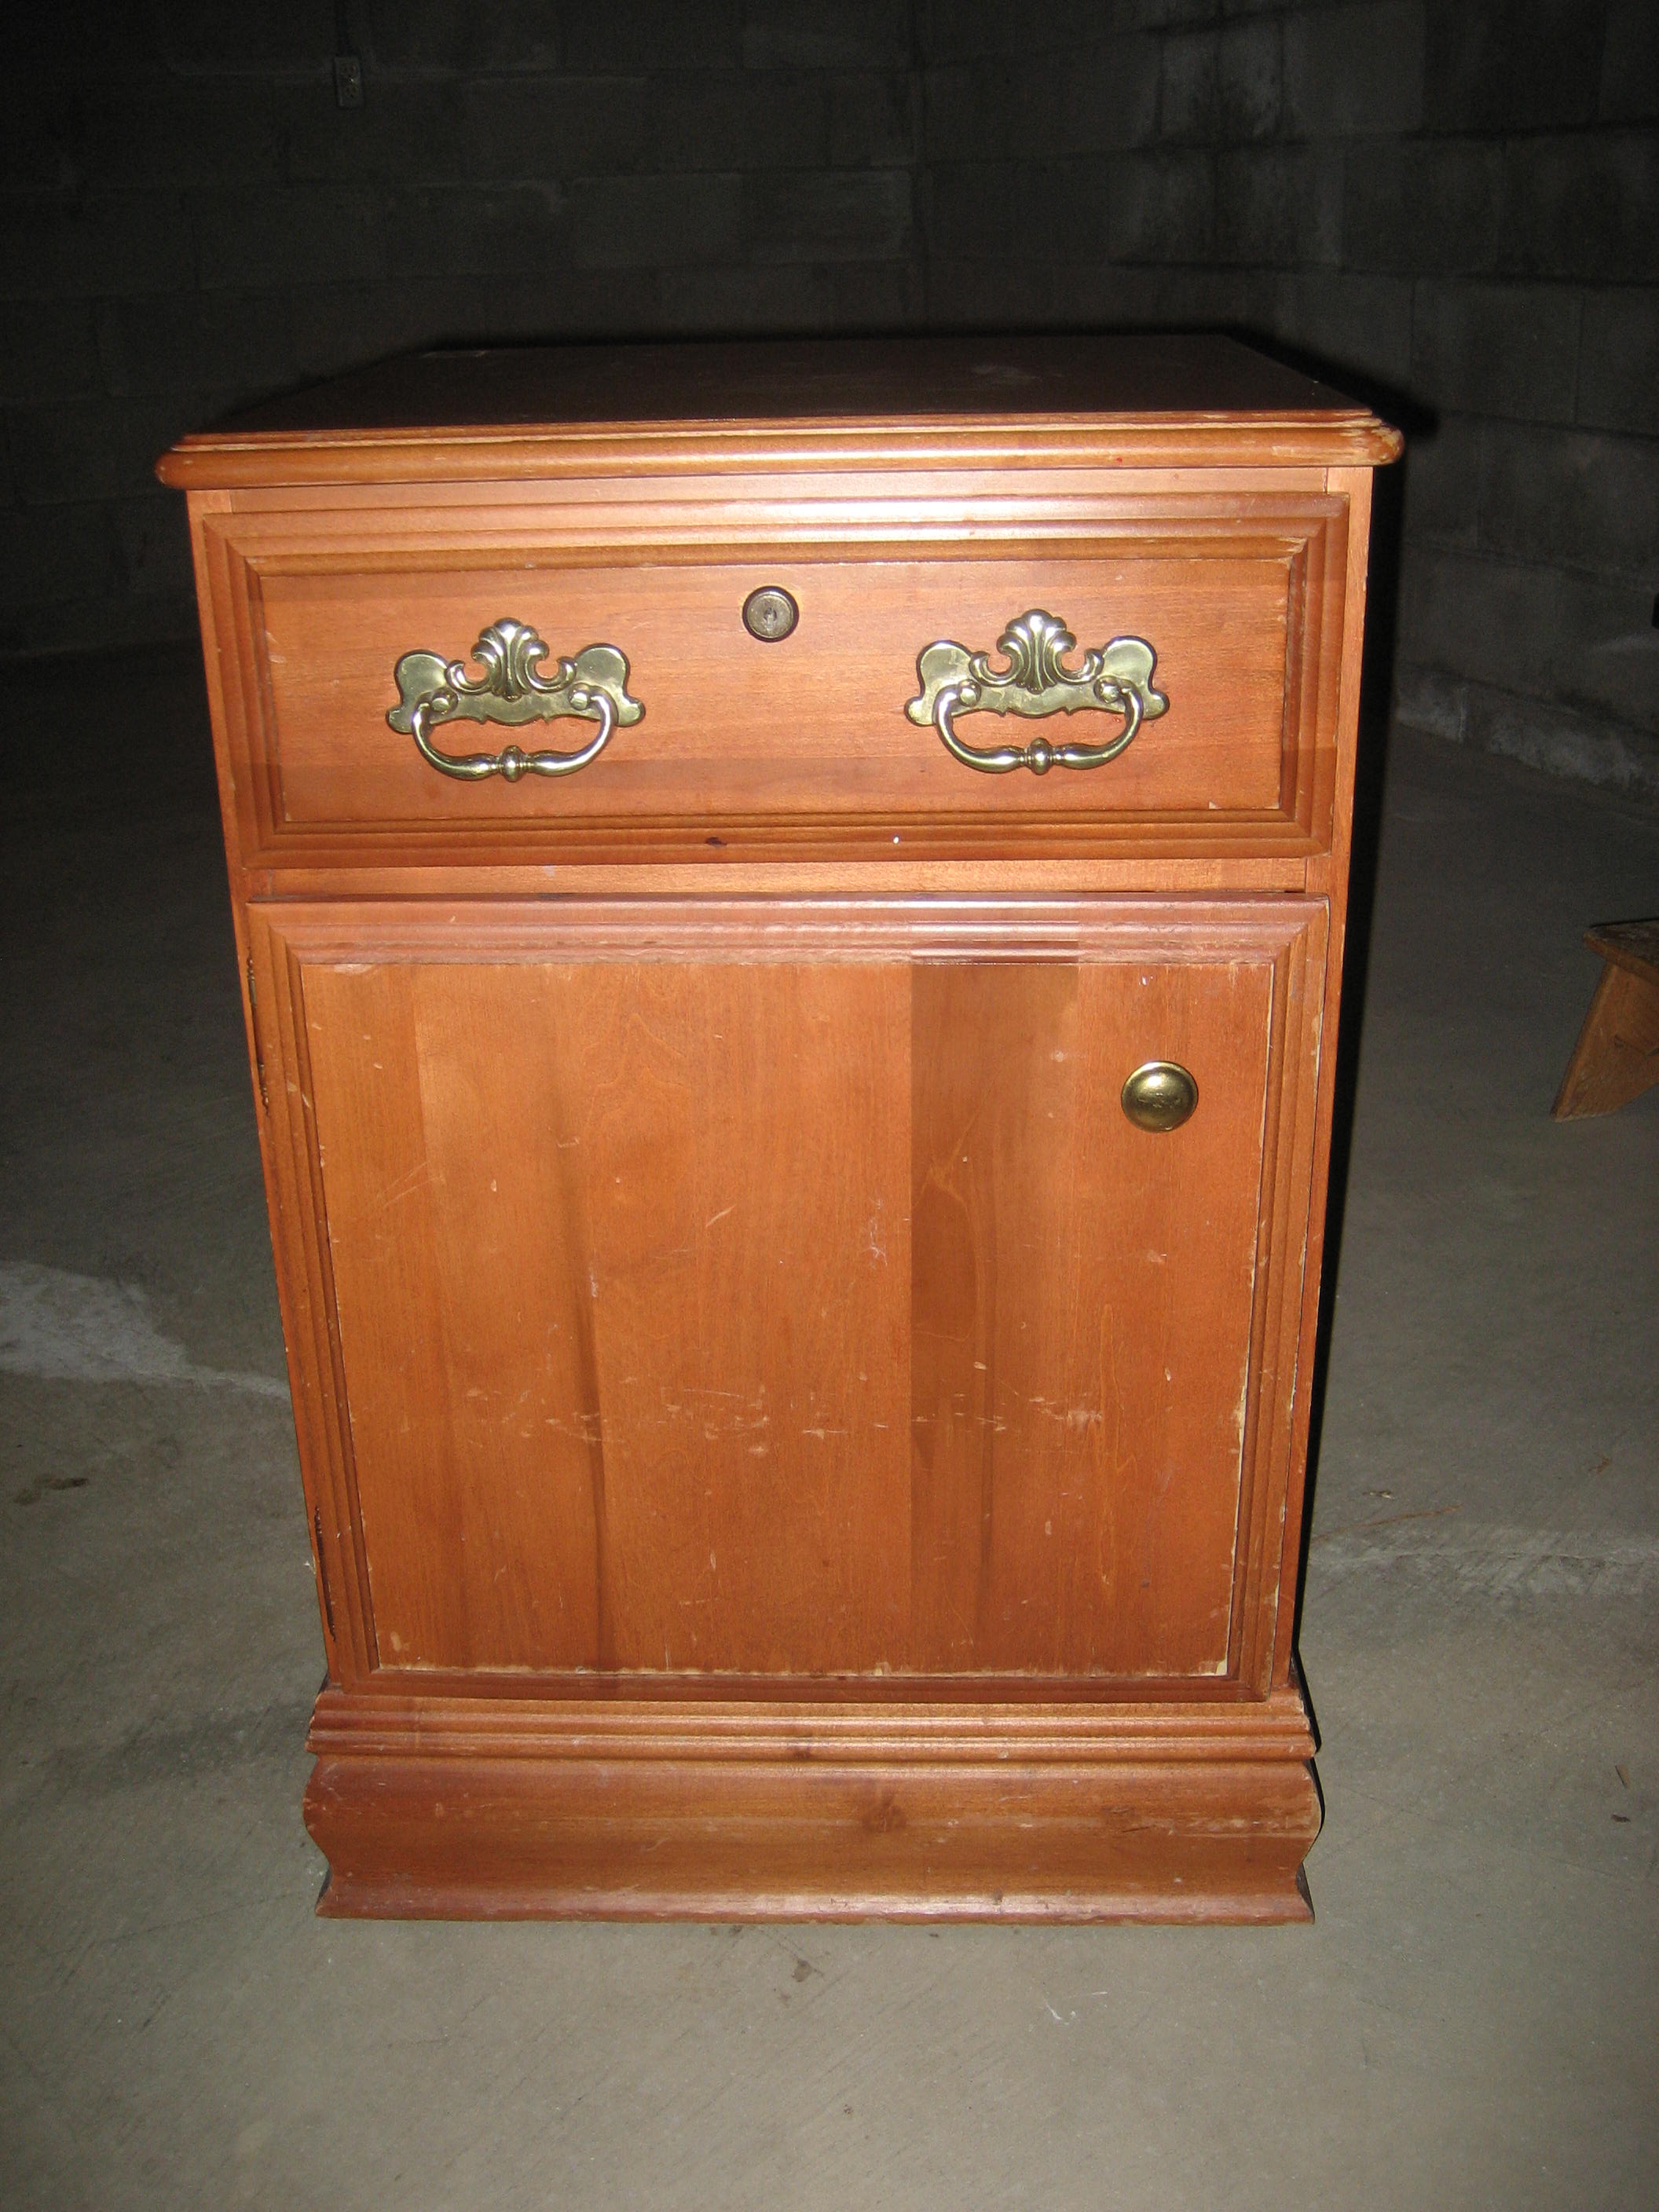
Love at second sight. Yeah, its fugly, but I saw real possibilities…
I’ll admit, the project started out with a bit of serendipity. I got the idea of a DYI artist taboret. I drove out to Henrietta, New York, where there are several thrift stores located in the same plaza, and I spotted it: a bedside stand in reasonably good shape, priced at only $15. With a drawer. And a shelf inside (missing the bracket pegs but that was a minor detail).
That said, I didn’t plunk down my $15 right away, because I was a bit concerned about the base. I wanted the taboret to have wheels, and I wasn’t sure how I’d mount them. Plus the base made it look kind of . . . massive!? For such a small piece of furniture . . .
But after shopping around a bit more I came back and flipped it over, and decided that hmmm . . . removing the base wouldn’t be that hard.
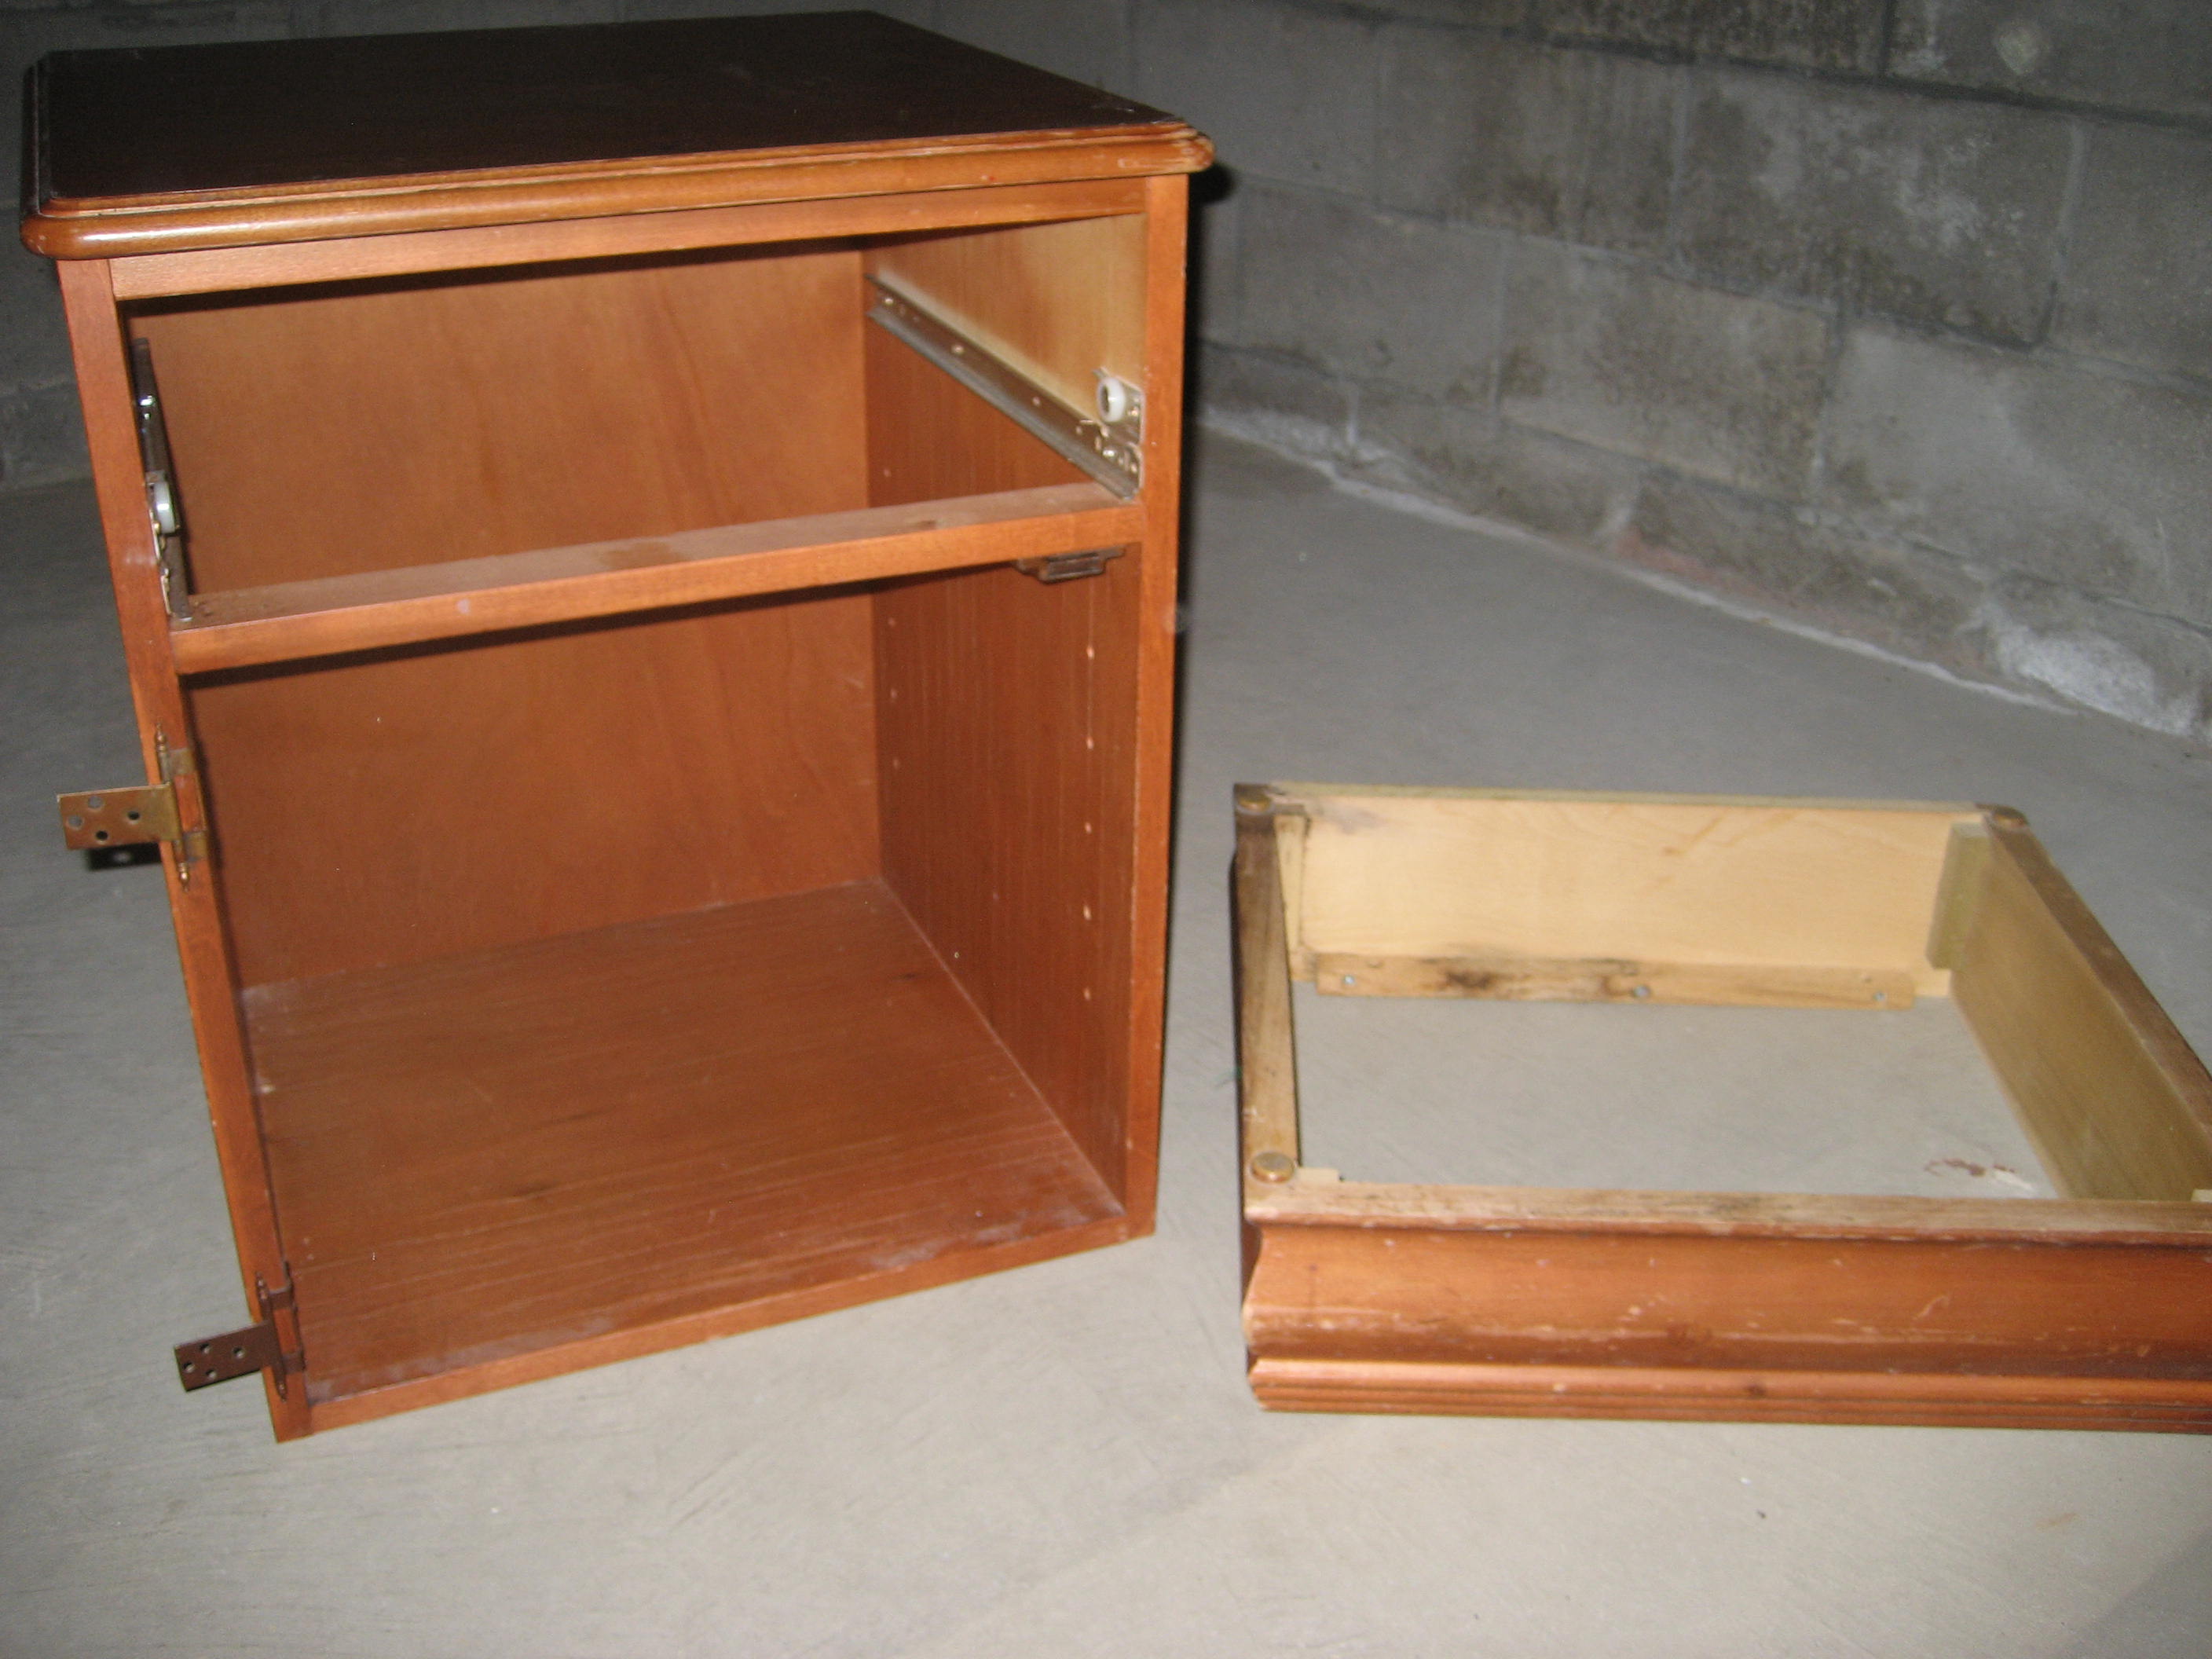
First step: took the base off, and the door, and removed the door knob and drawer pulls.
And sure enough, it wasn’t: when I got it home I was able to take it apart without much trouble :)
Then I gave it a light sanding so the primer/paint would stick, mounted casters on the base (see the hardware section below) and I was on my way.
The Leaves
One of the main requirements for the taboret was to provide extra work space; given the dimensions of the nightstand, that meant I had to add folding leaves to either side.
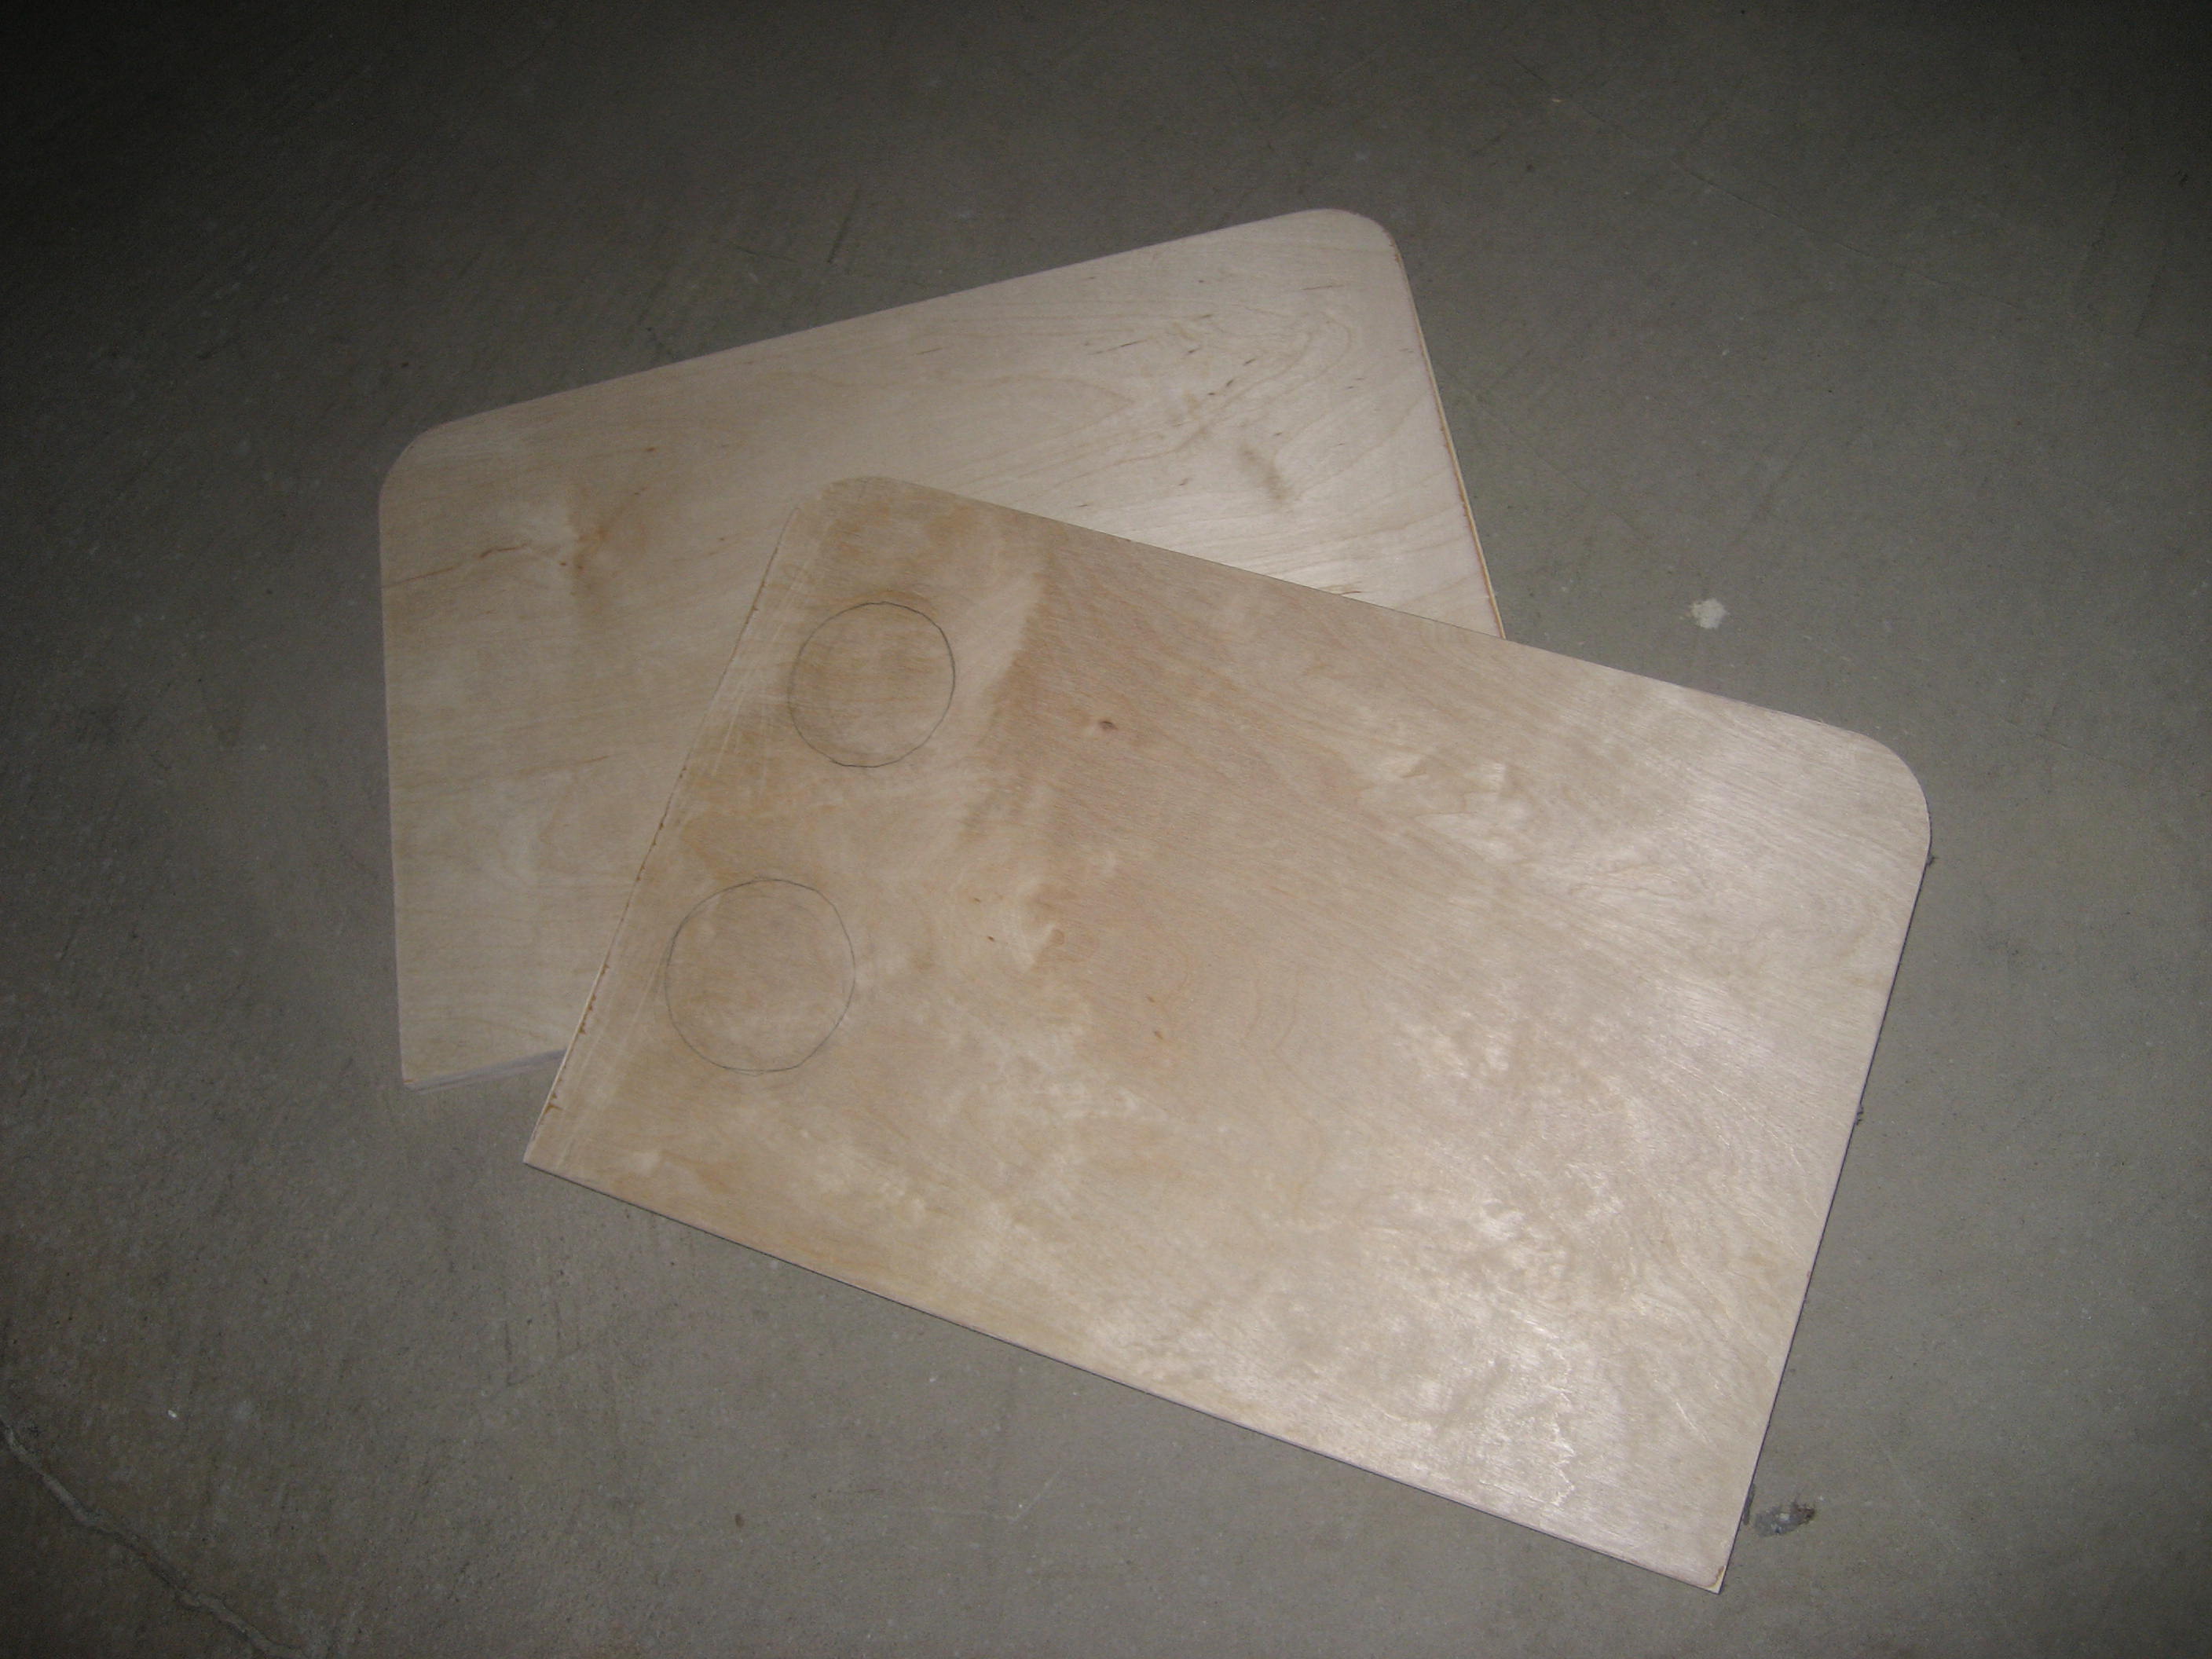
To do this, I bought a piece of 1-inch plywood from Home Depot and — since I don’t own a power saw — had them cut it so I’d have two 12×18 pieces.
I rounded their outside corners using a hand saw and sanded them.

Plywood, cut.
Leaves, after I rounded the corners.
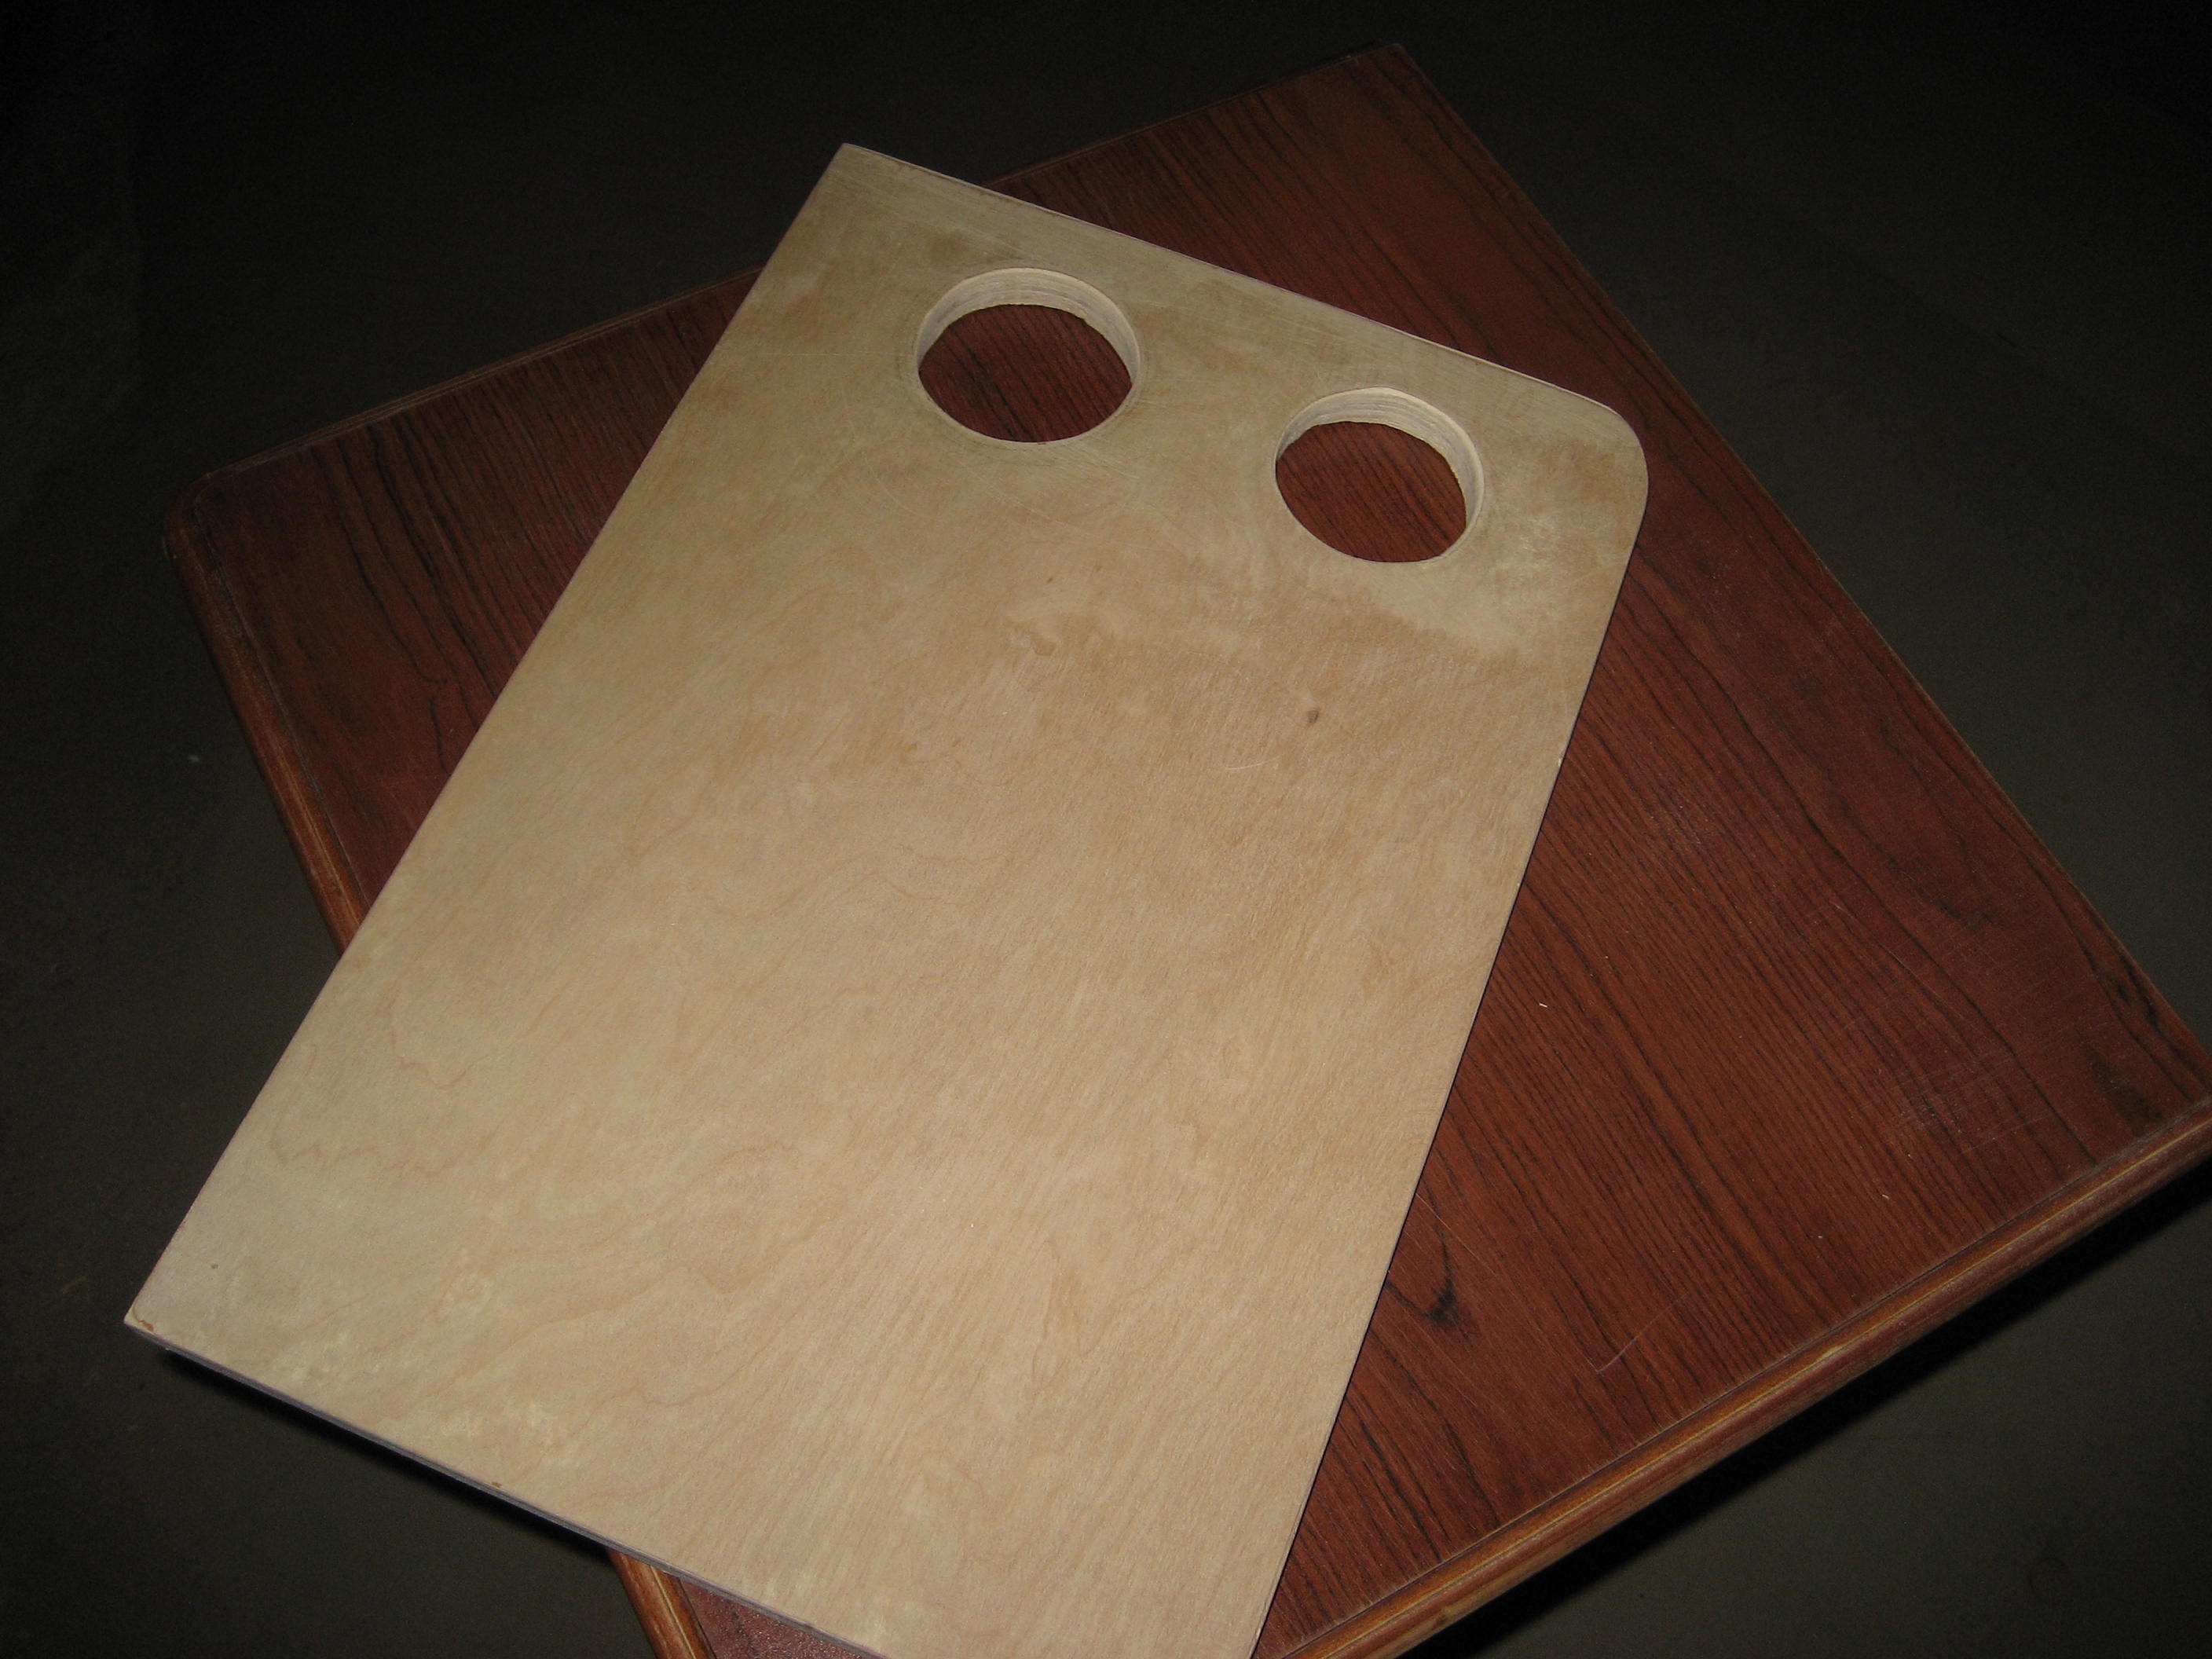
Taboret leaf with holes cut in it for the brush and water holders.
I also wanted the taboret to have a place to secure a brush holder and cup. I hunted around on the Interwebs for a bona fide, made-for-artist brush holder-and-cup set, but didn’t find one. So instead, I bought a brushed steel toothbrush holder and cup from Target (pic below) and sized inset holes to them :)
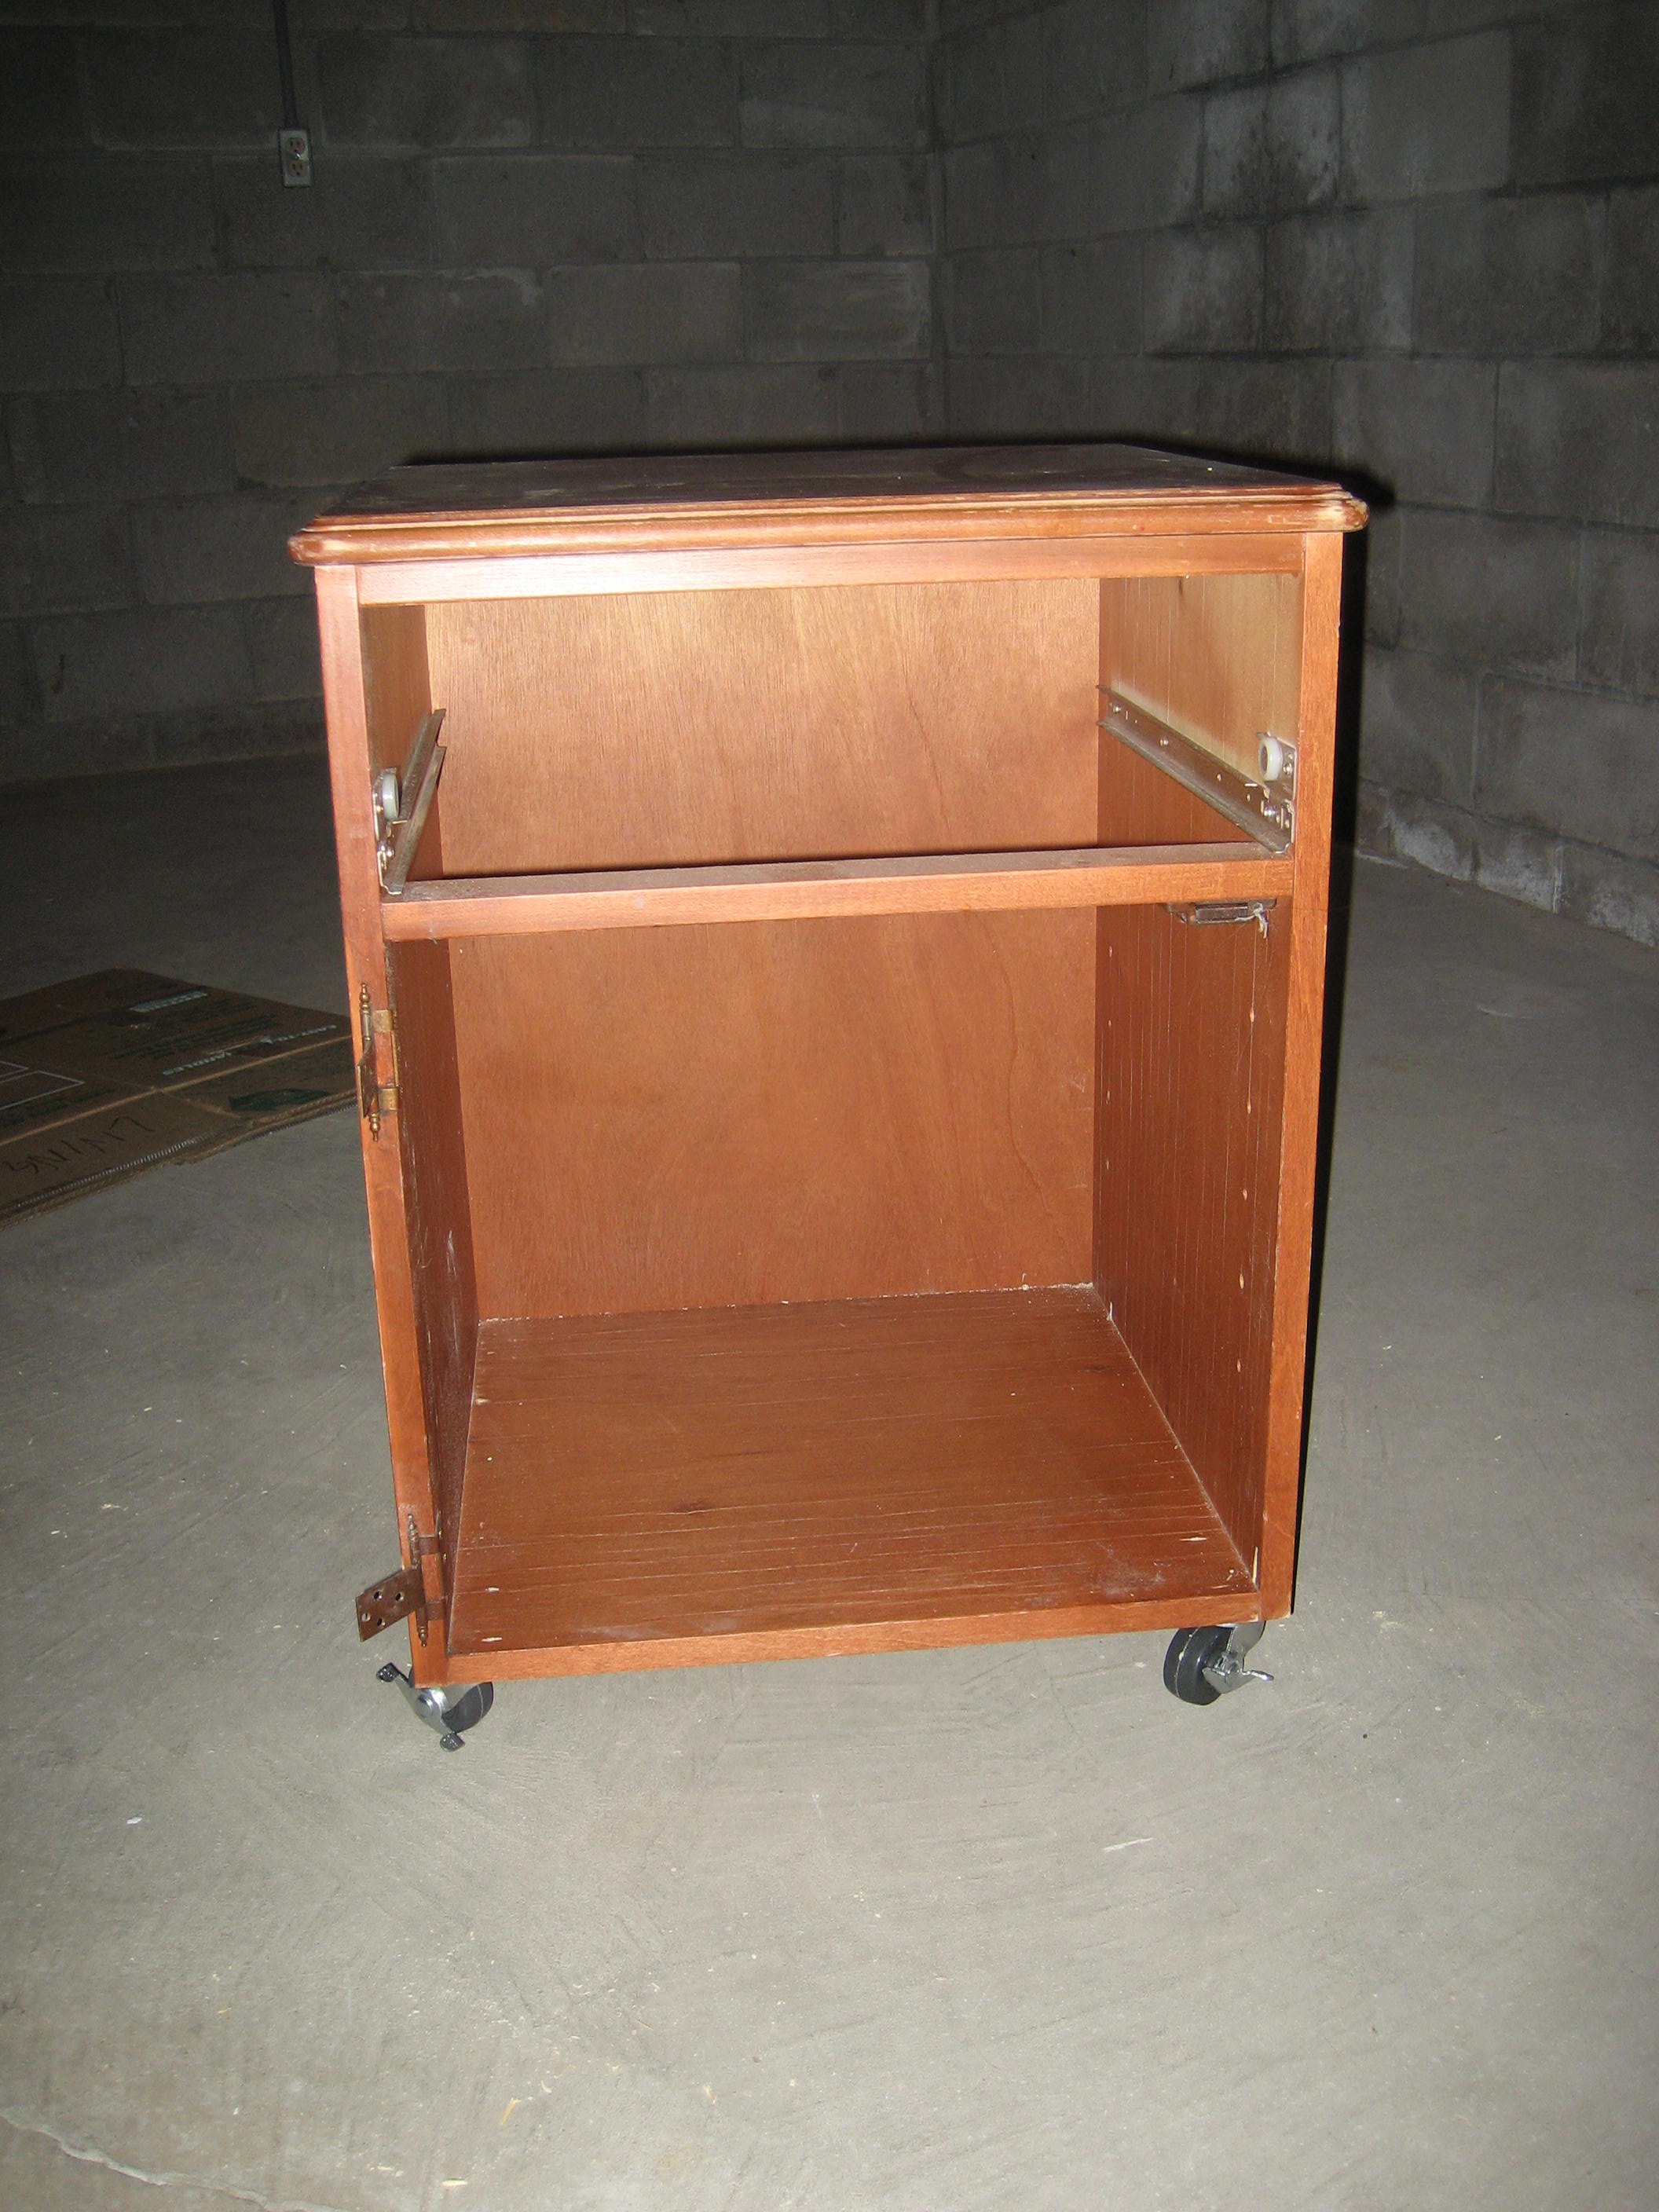
After I removed the base, it was a cinch to mount casters on the bottom.
Once I had all the pieces cut/shaped, I primered everything.
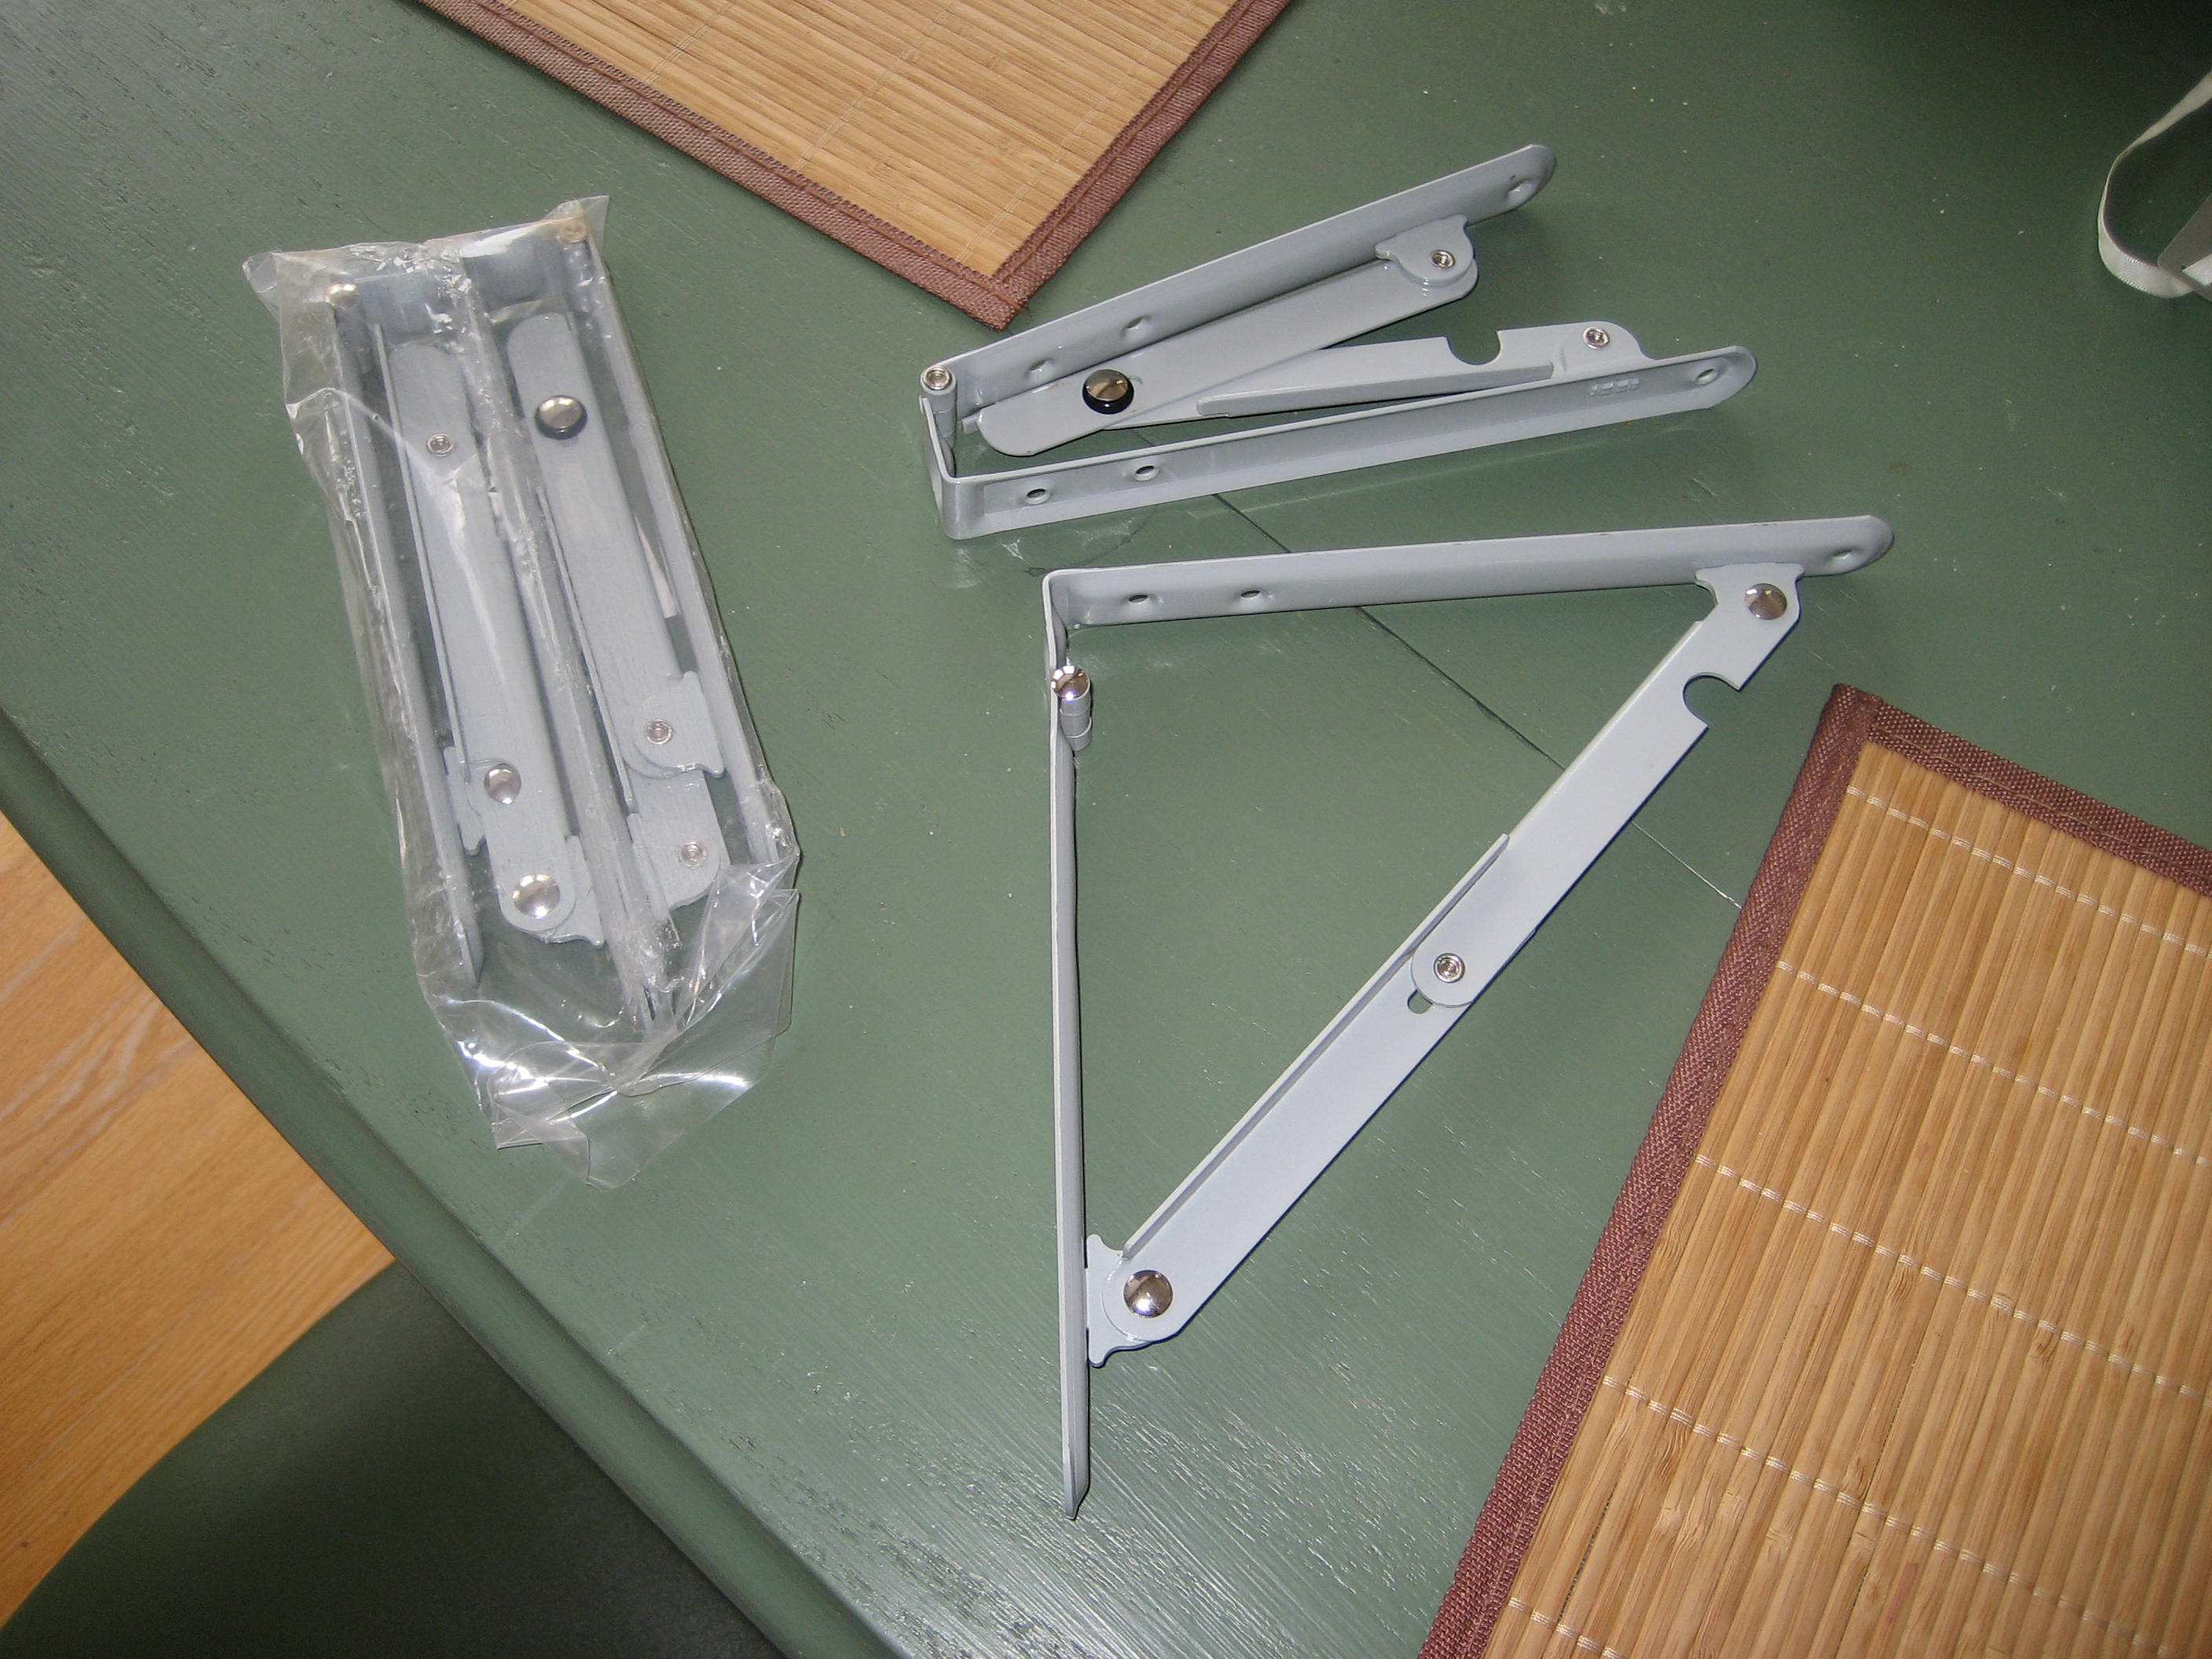
The brackets I used for the taboret leaves.
To mount the leaves, I purchased some folding shelf brackets. I couldn’t find what I wanted locally, so I bought these brackets from Amazon: Folding Shelf Bracket SP1794 8in x 8in Sold in pairs. I chose them because they are heavy-duty and I trusted they would lock out and stay locked out.
The only thing I’d do differently: I bought four brackets total (two sets at ~$18/set) and turns out I really only needed one per leaf. Two per leaf was more support than is really necessary, and operating two brackets on one leaf is a bit of a pia (to collapse them, you have to collapse them both at once).
Plus if I’d used only bracket per side it would have cut my costs by around $20.
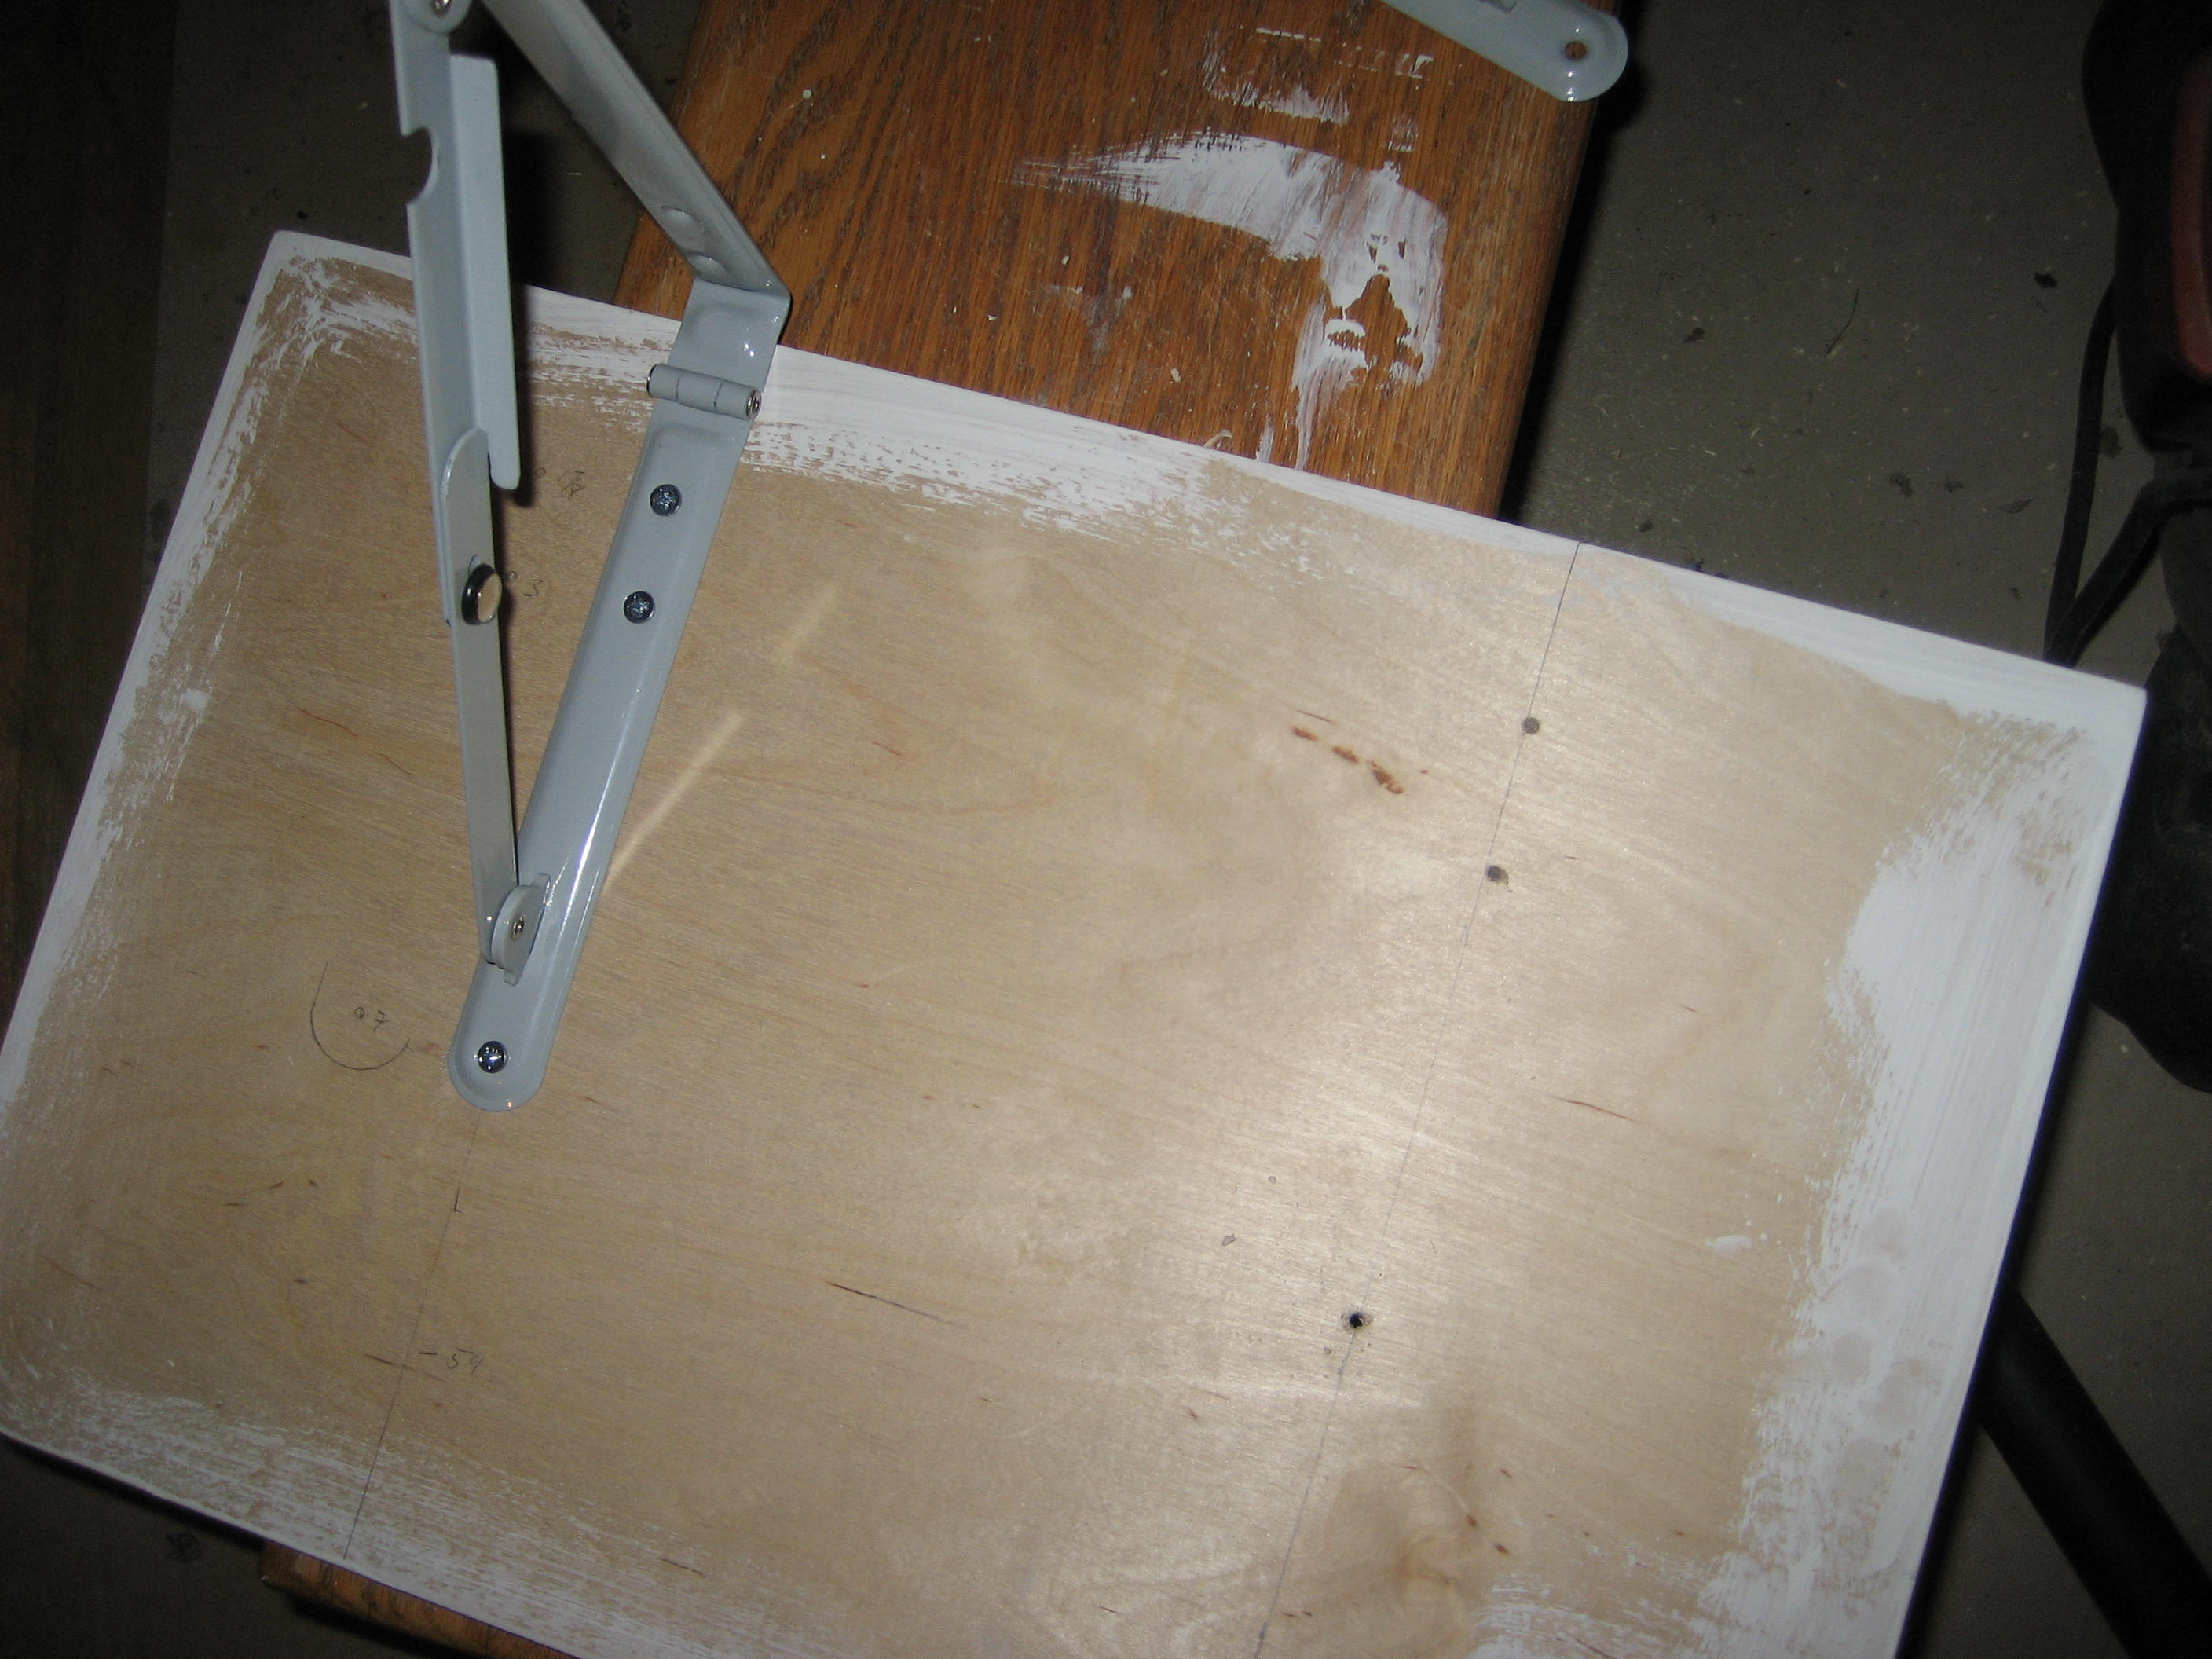
Mounted the brackets on the leaf…
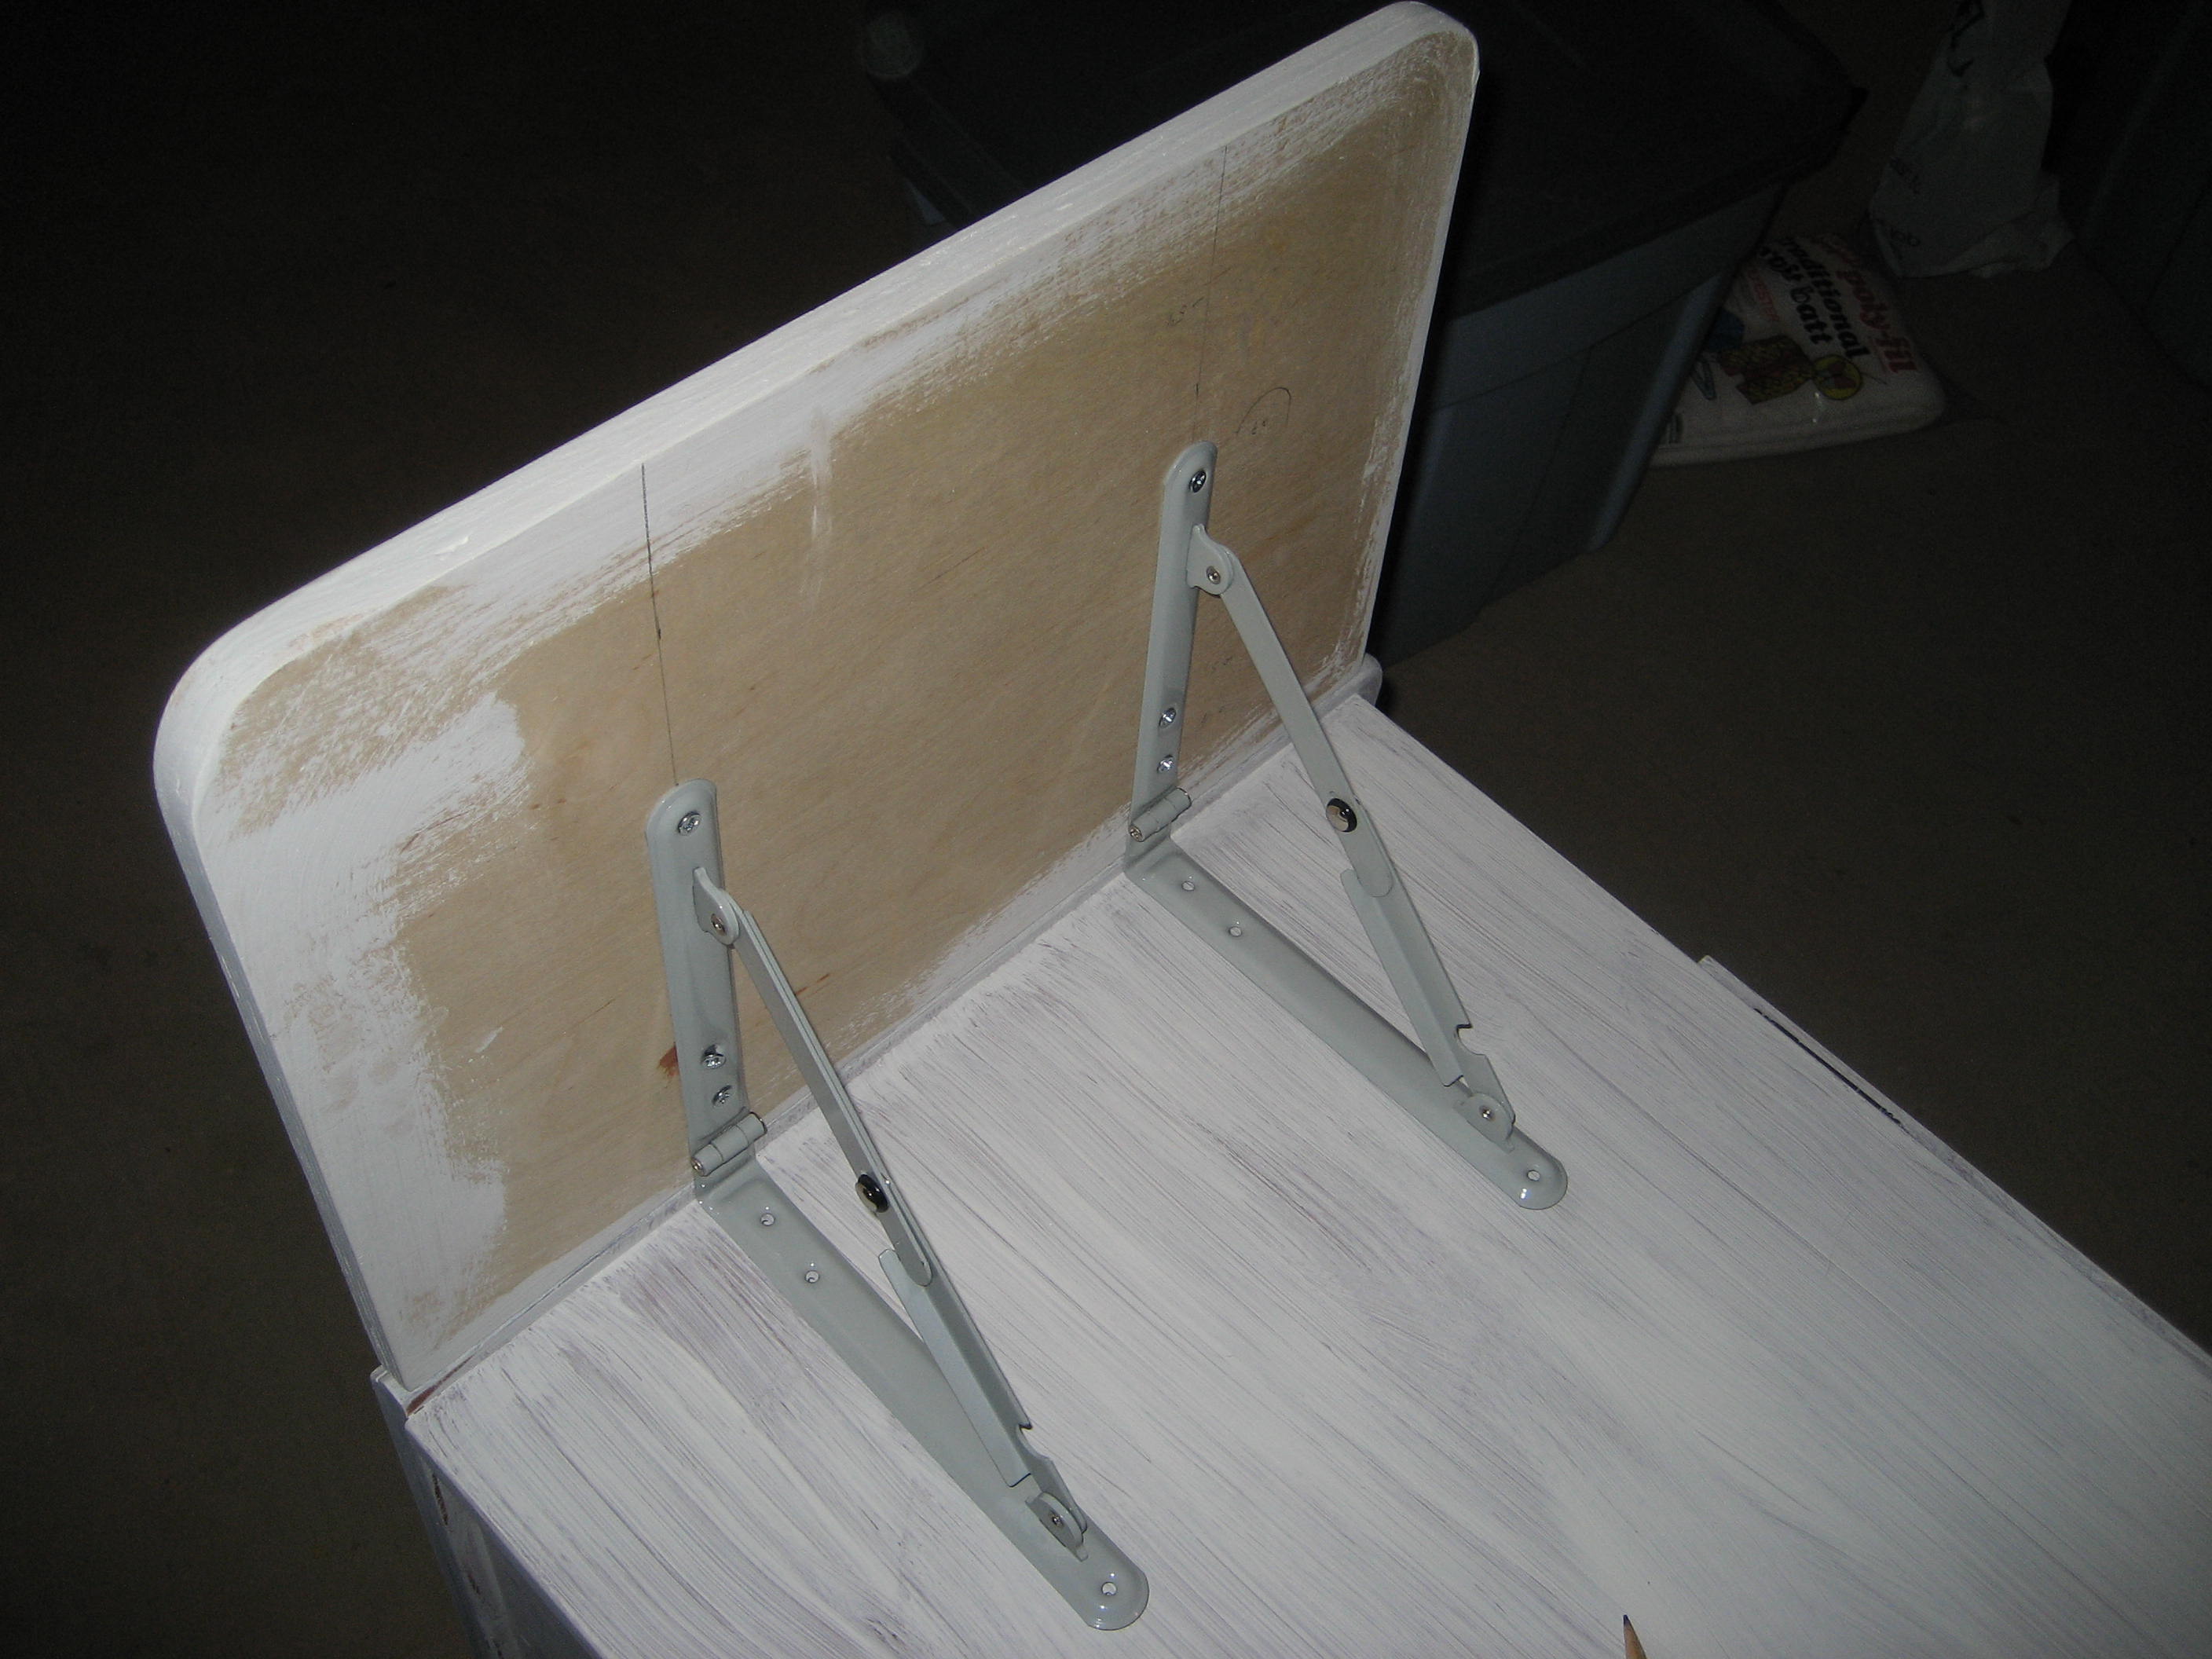
. . . then attached them to the side of the taboret.

Miraculously, I did it right! The top of the leaves is flush with the top of the stand when they’re extended :)
The Rest of the Hardware
Here’s the other hardware I purchased:
- Toothbrush holder and cup (see above, from Target);
- Door knob and drawer pulls;
- Four casters (two locking);
- Mirror mounts;
- Pegs for the interior shelf.
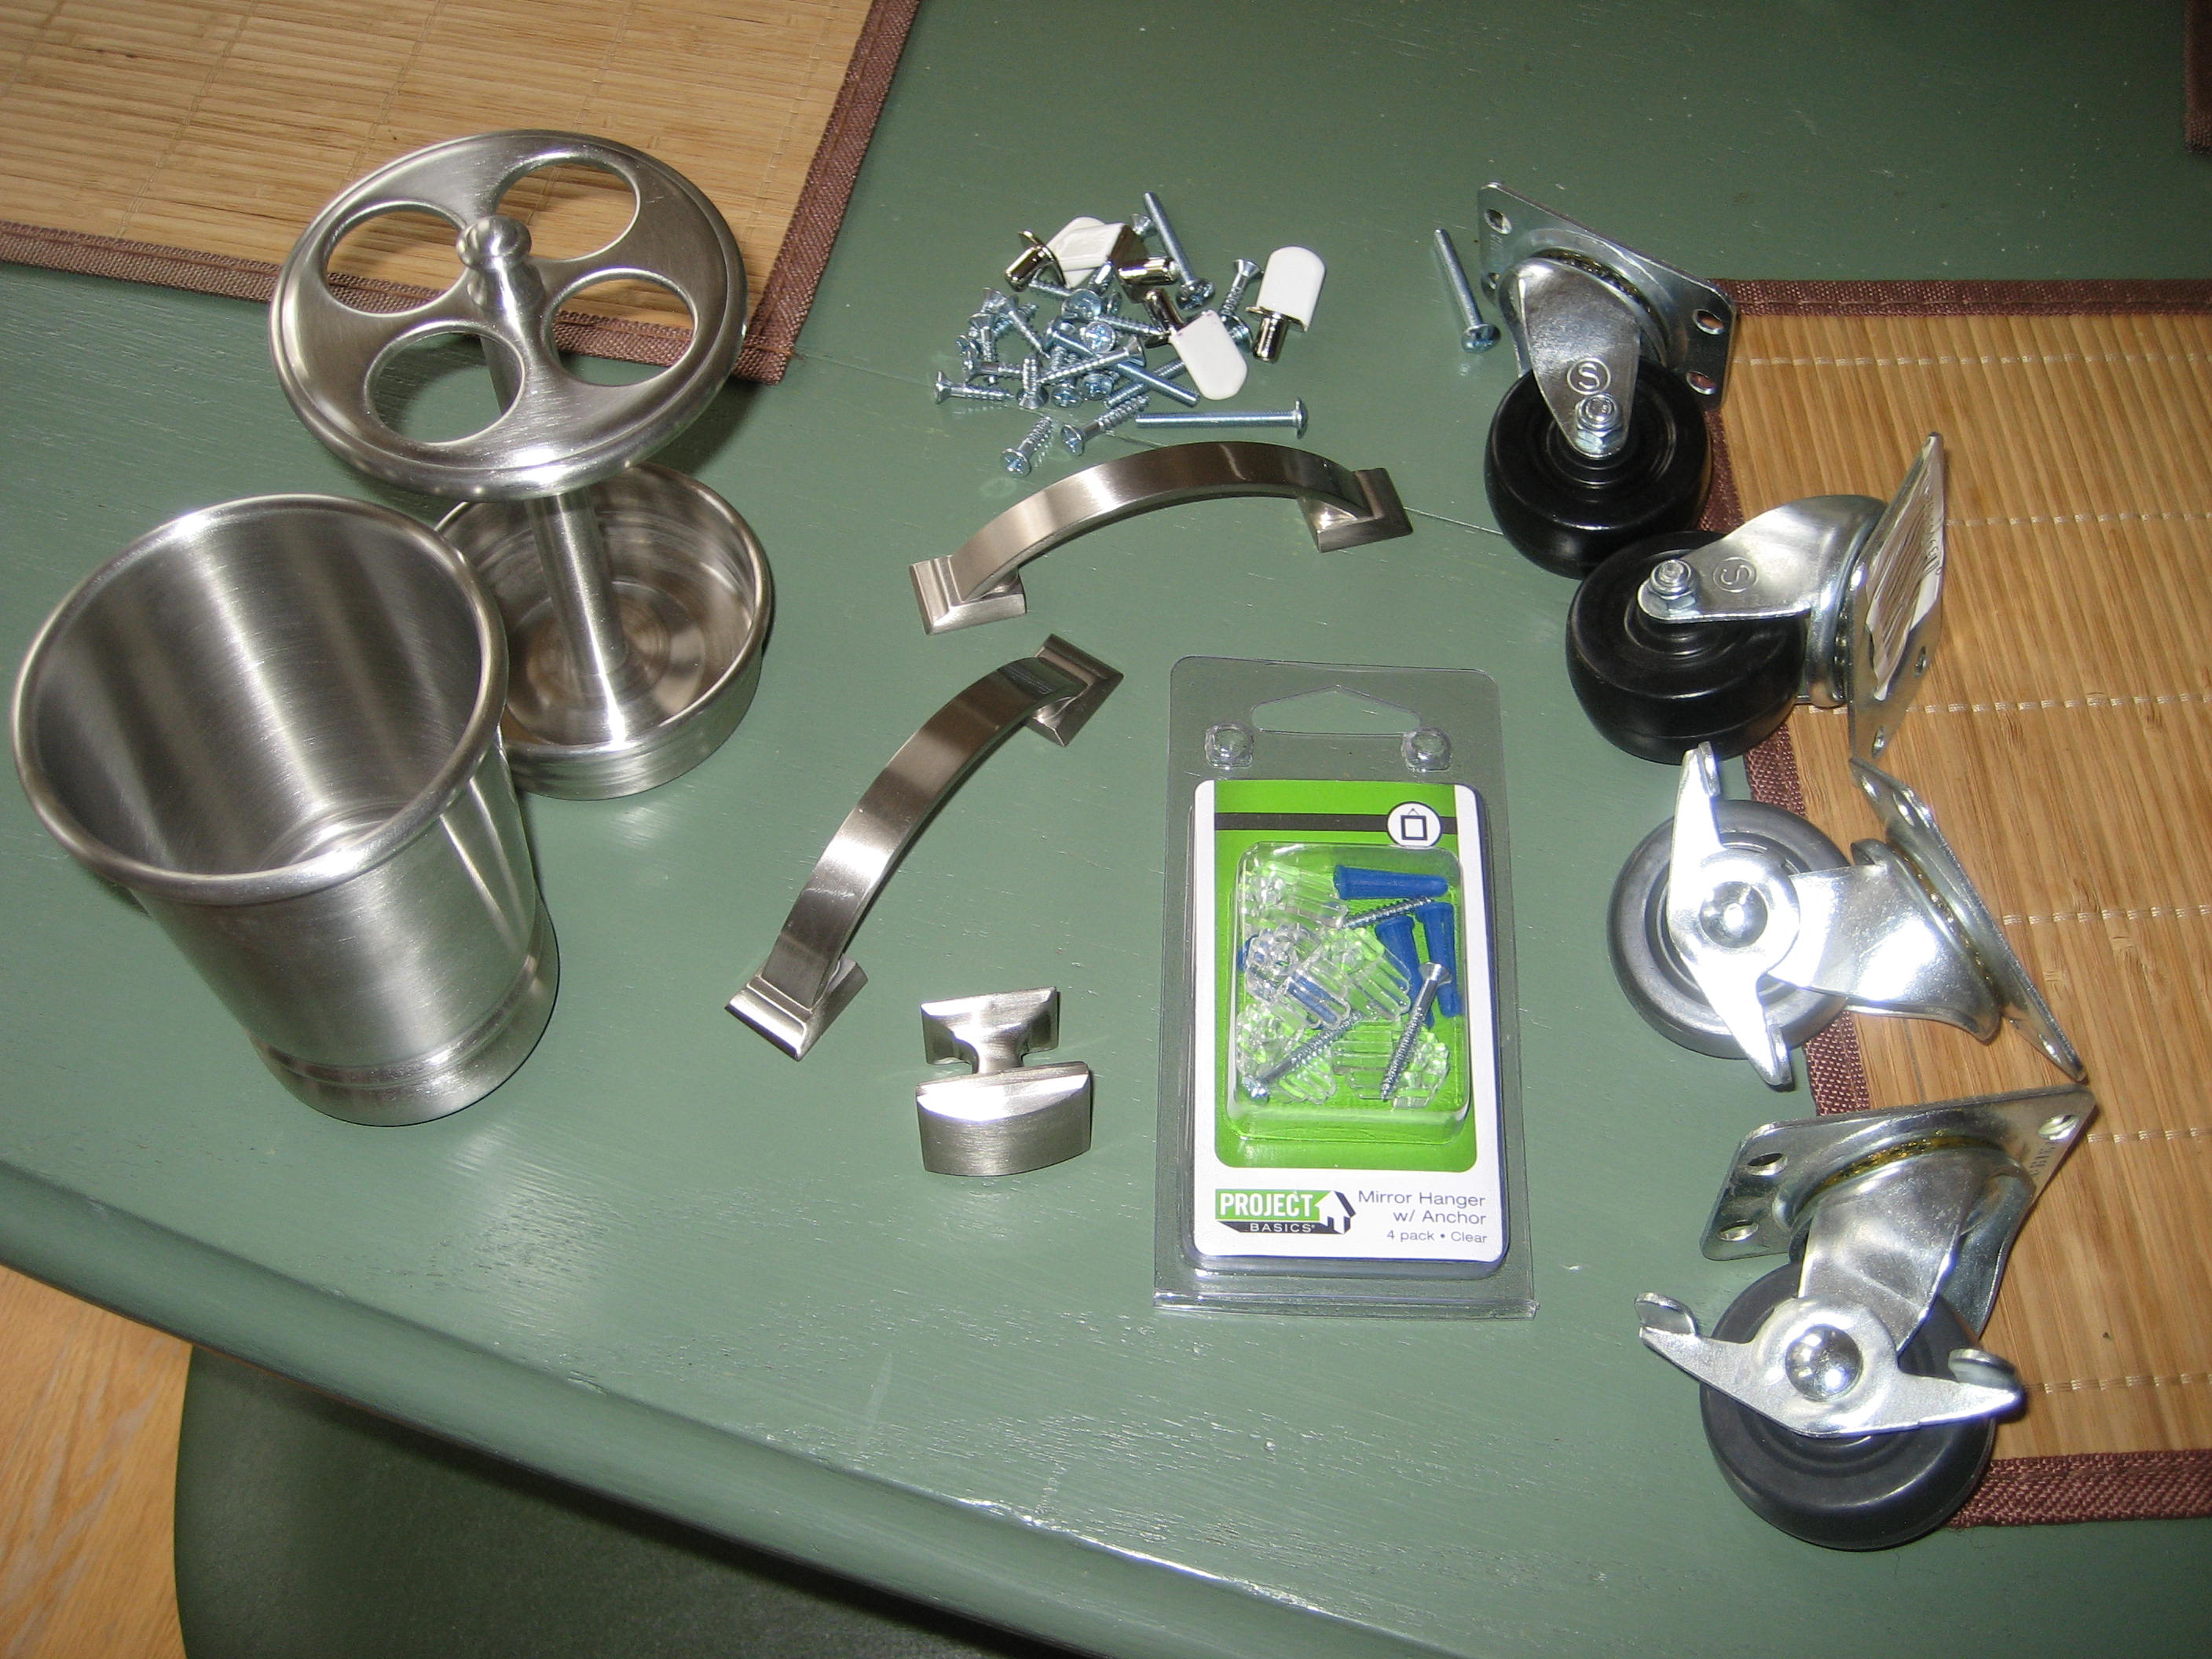
The hardware I purchased for the taboret.
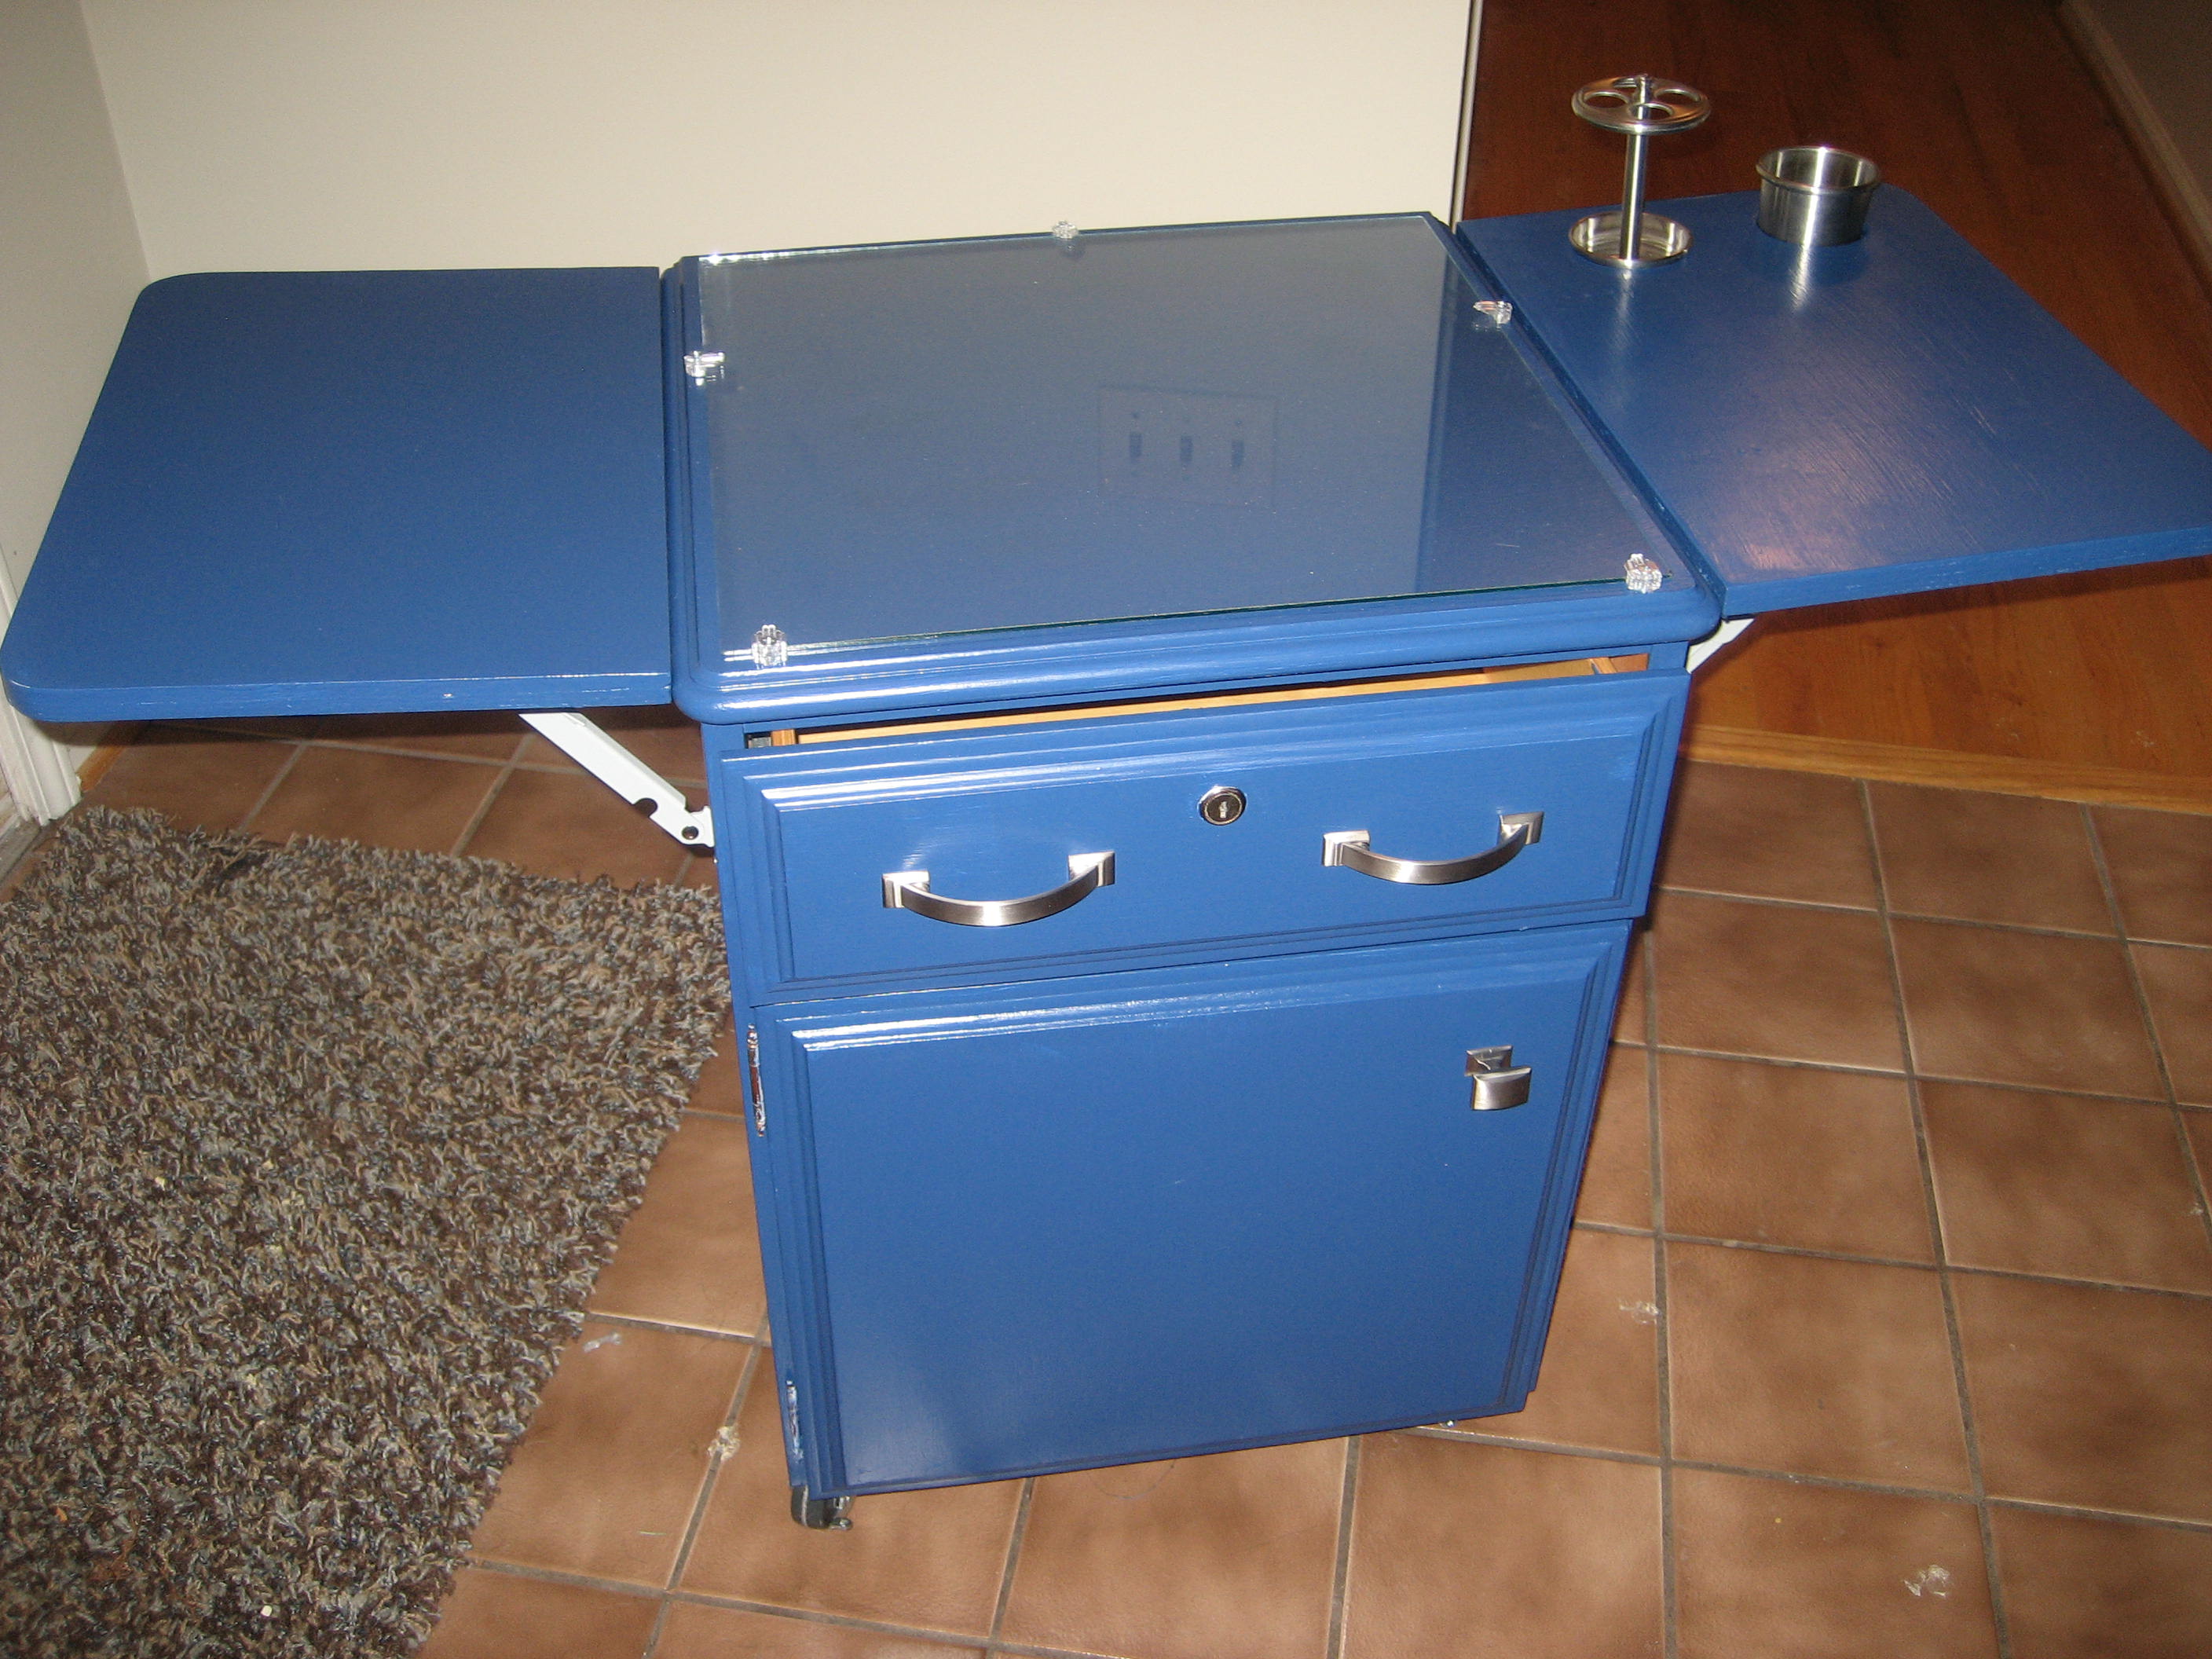
I also purchased a piece of glass for the top of the stand (to serve as a palette) and paint.
I chose a high-quality oil base paint because I wanted something that would be super durable.
Cost for everything pictured left, plus the glass and the paint: about $100.
The Sneaking Around :)
Since this was a top secret Christmas gift, I worked on it in the basement while the teenager-in-residence was in school.
When I wasn’t working on it, I hid the evidence by mixing it in with other items stored down there. And my scheme worked! Although once I started painting, there was a bit of a paint smell, and she noticed it.

Painting in progress :)
I made up some story about smell coming from the neighbor’s house or something :)
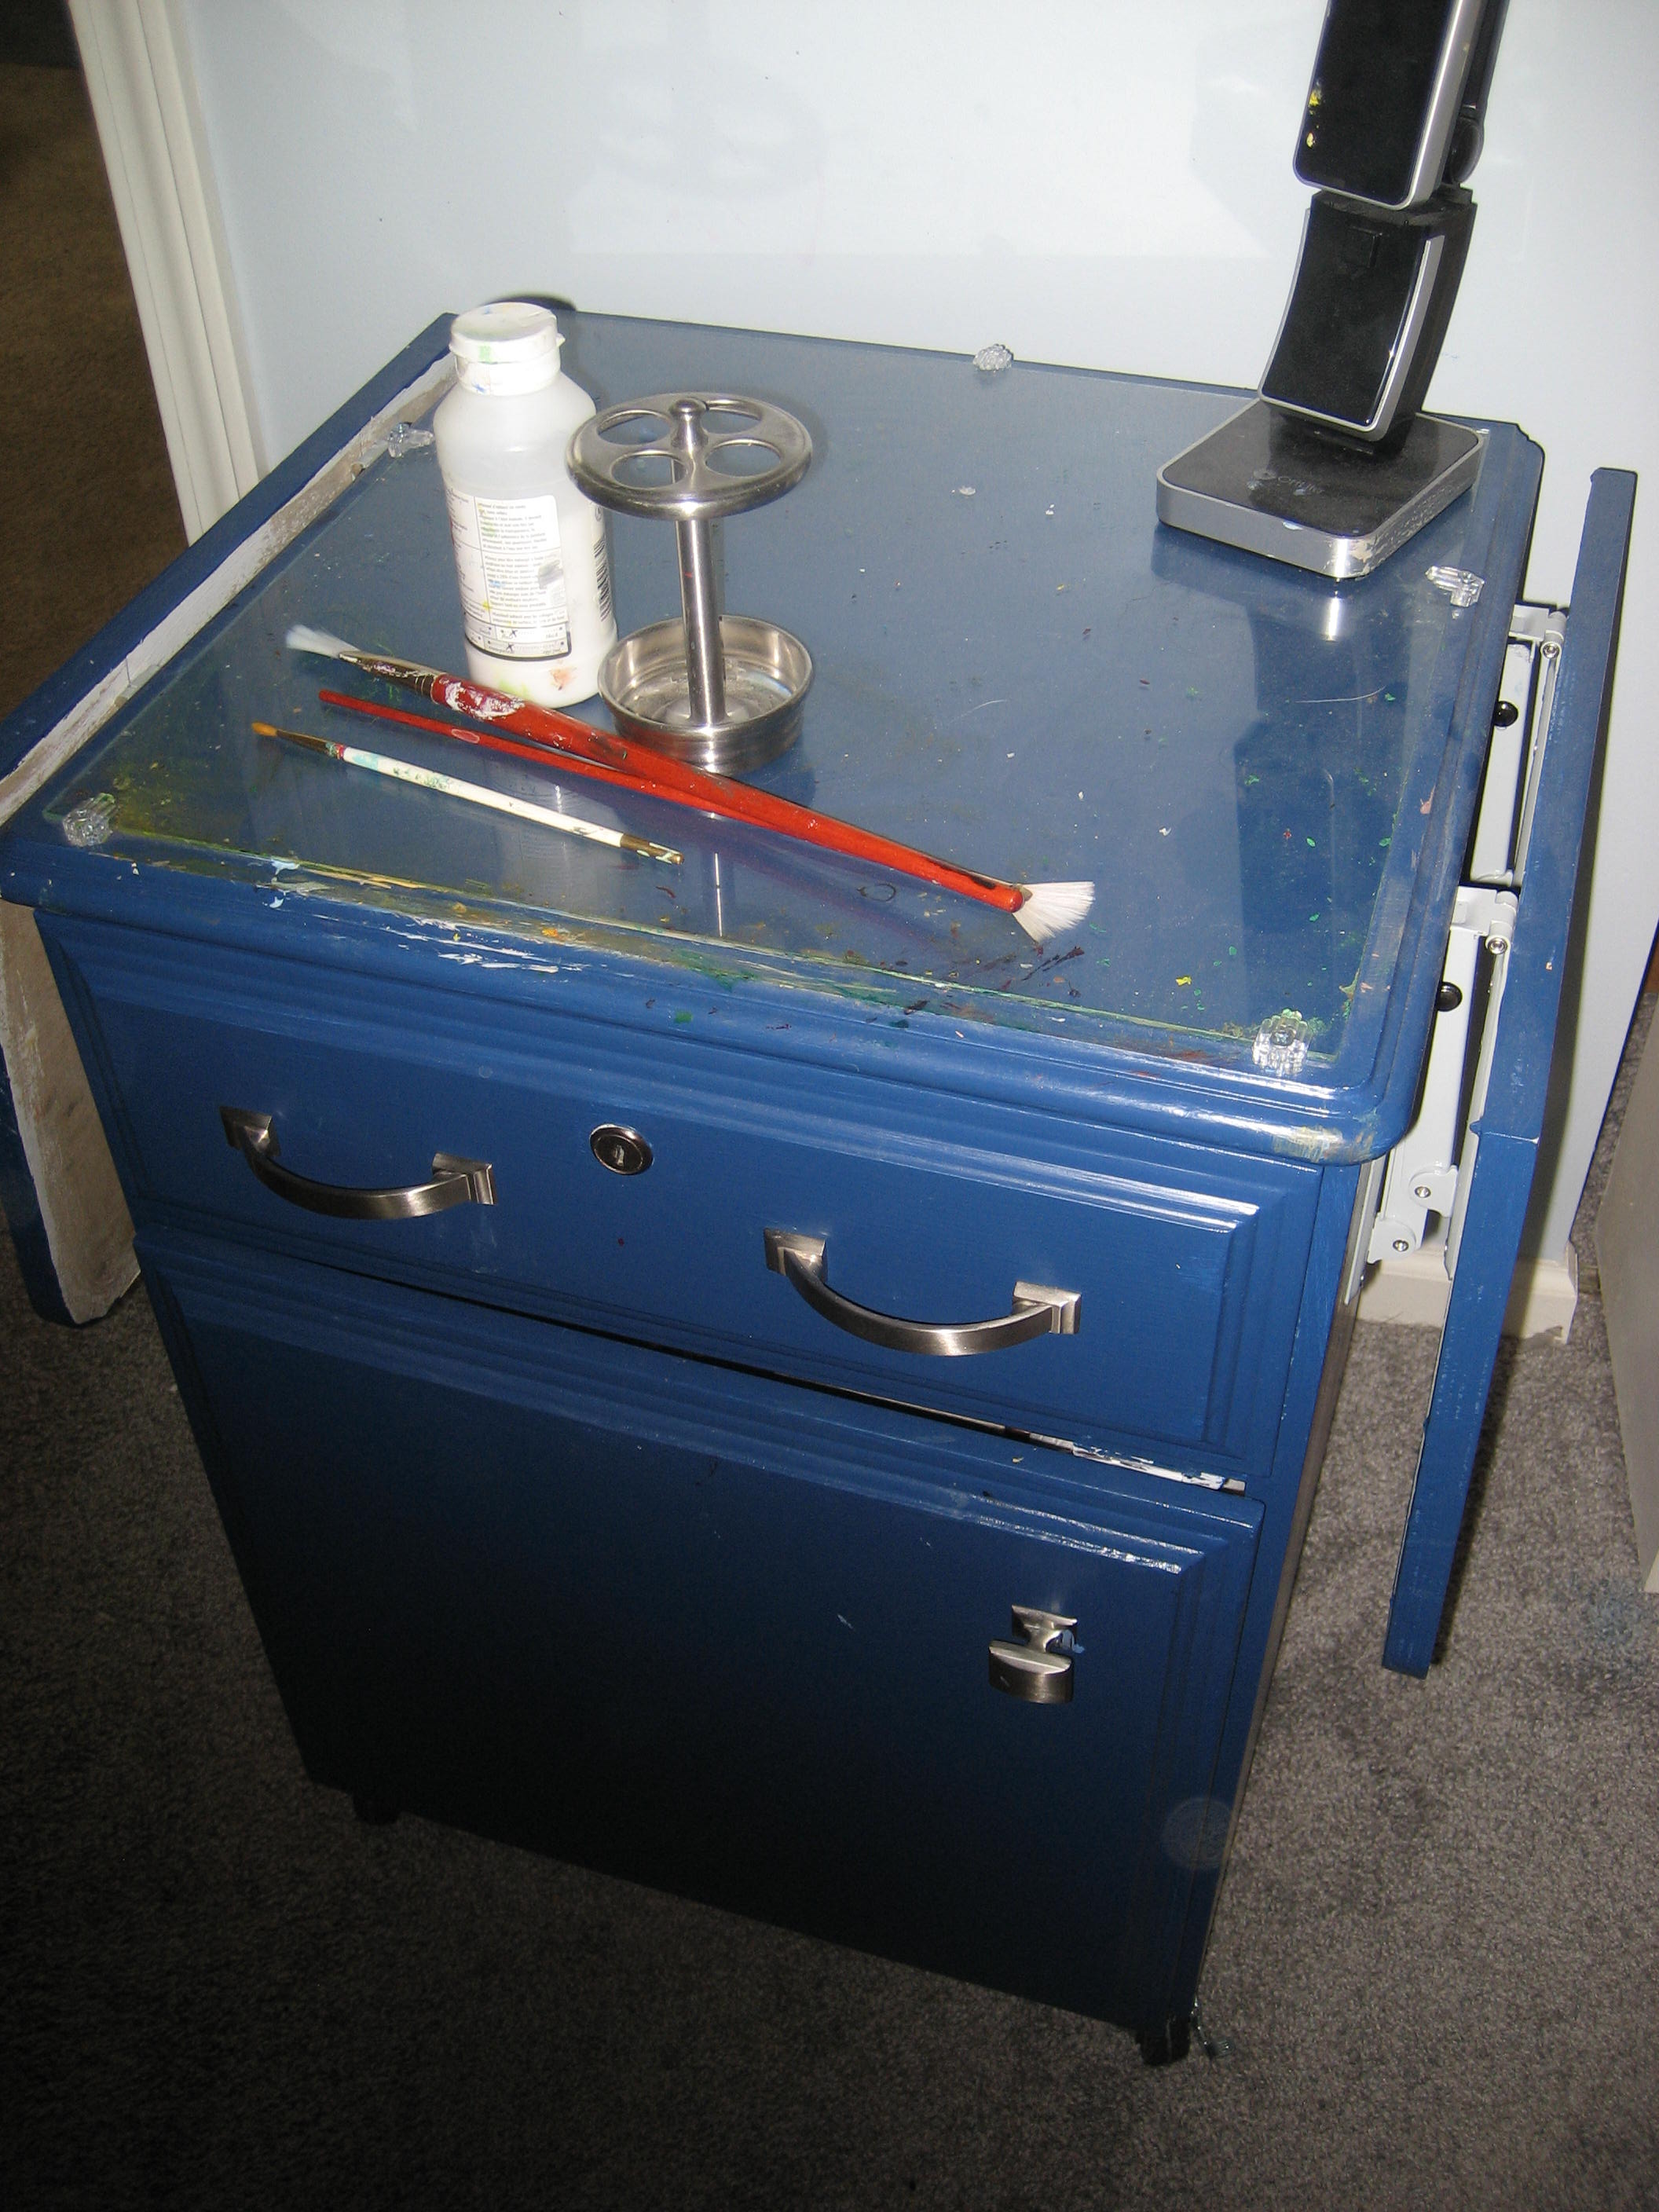
Once it was painted, I installed the door knob and drawer pulls, and the glass palette on the top (used mirror mounts for that).
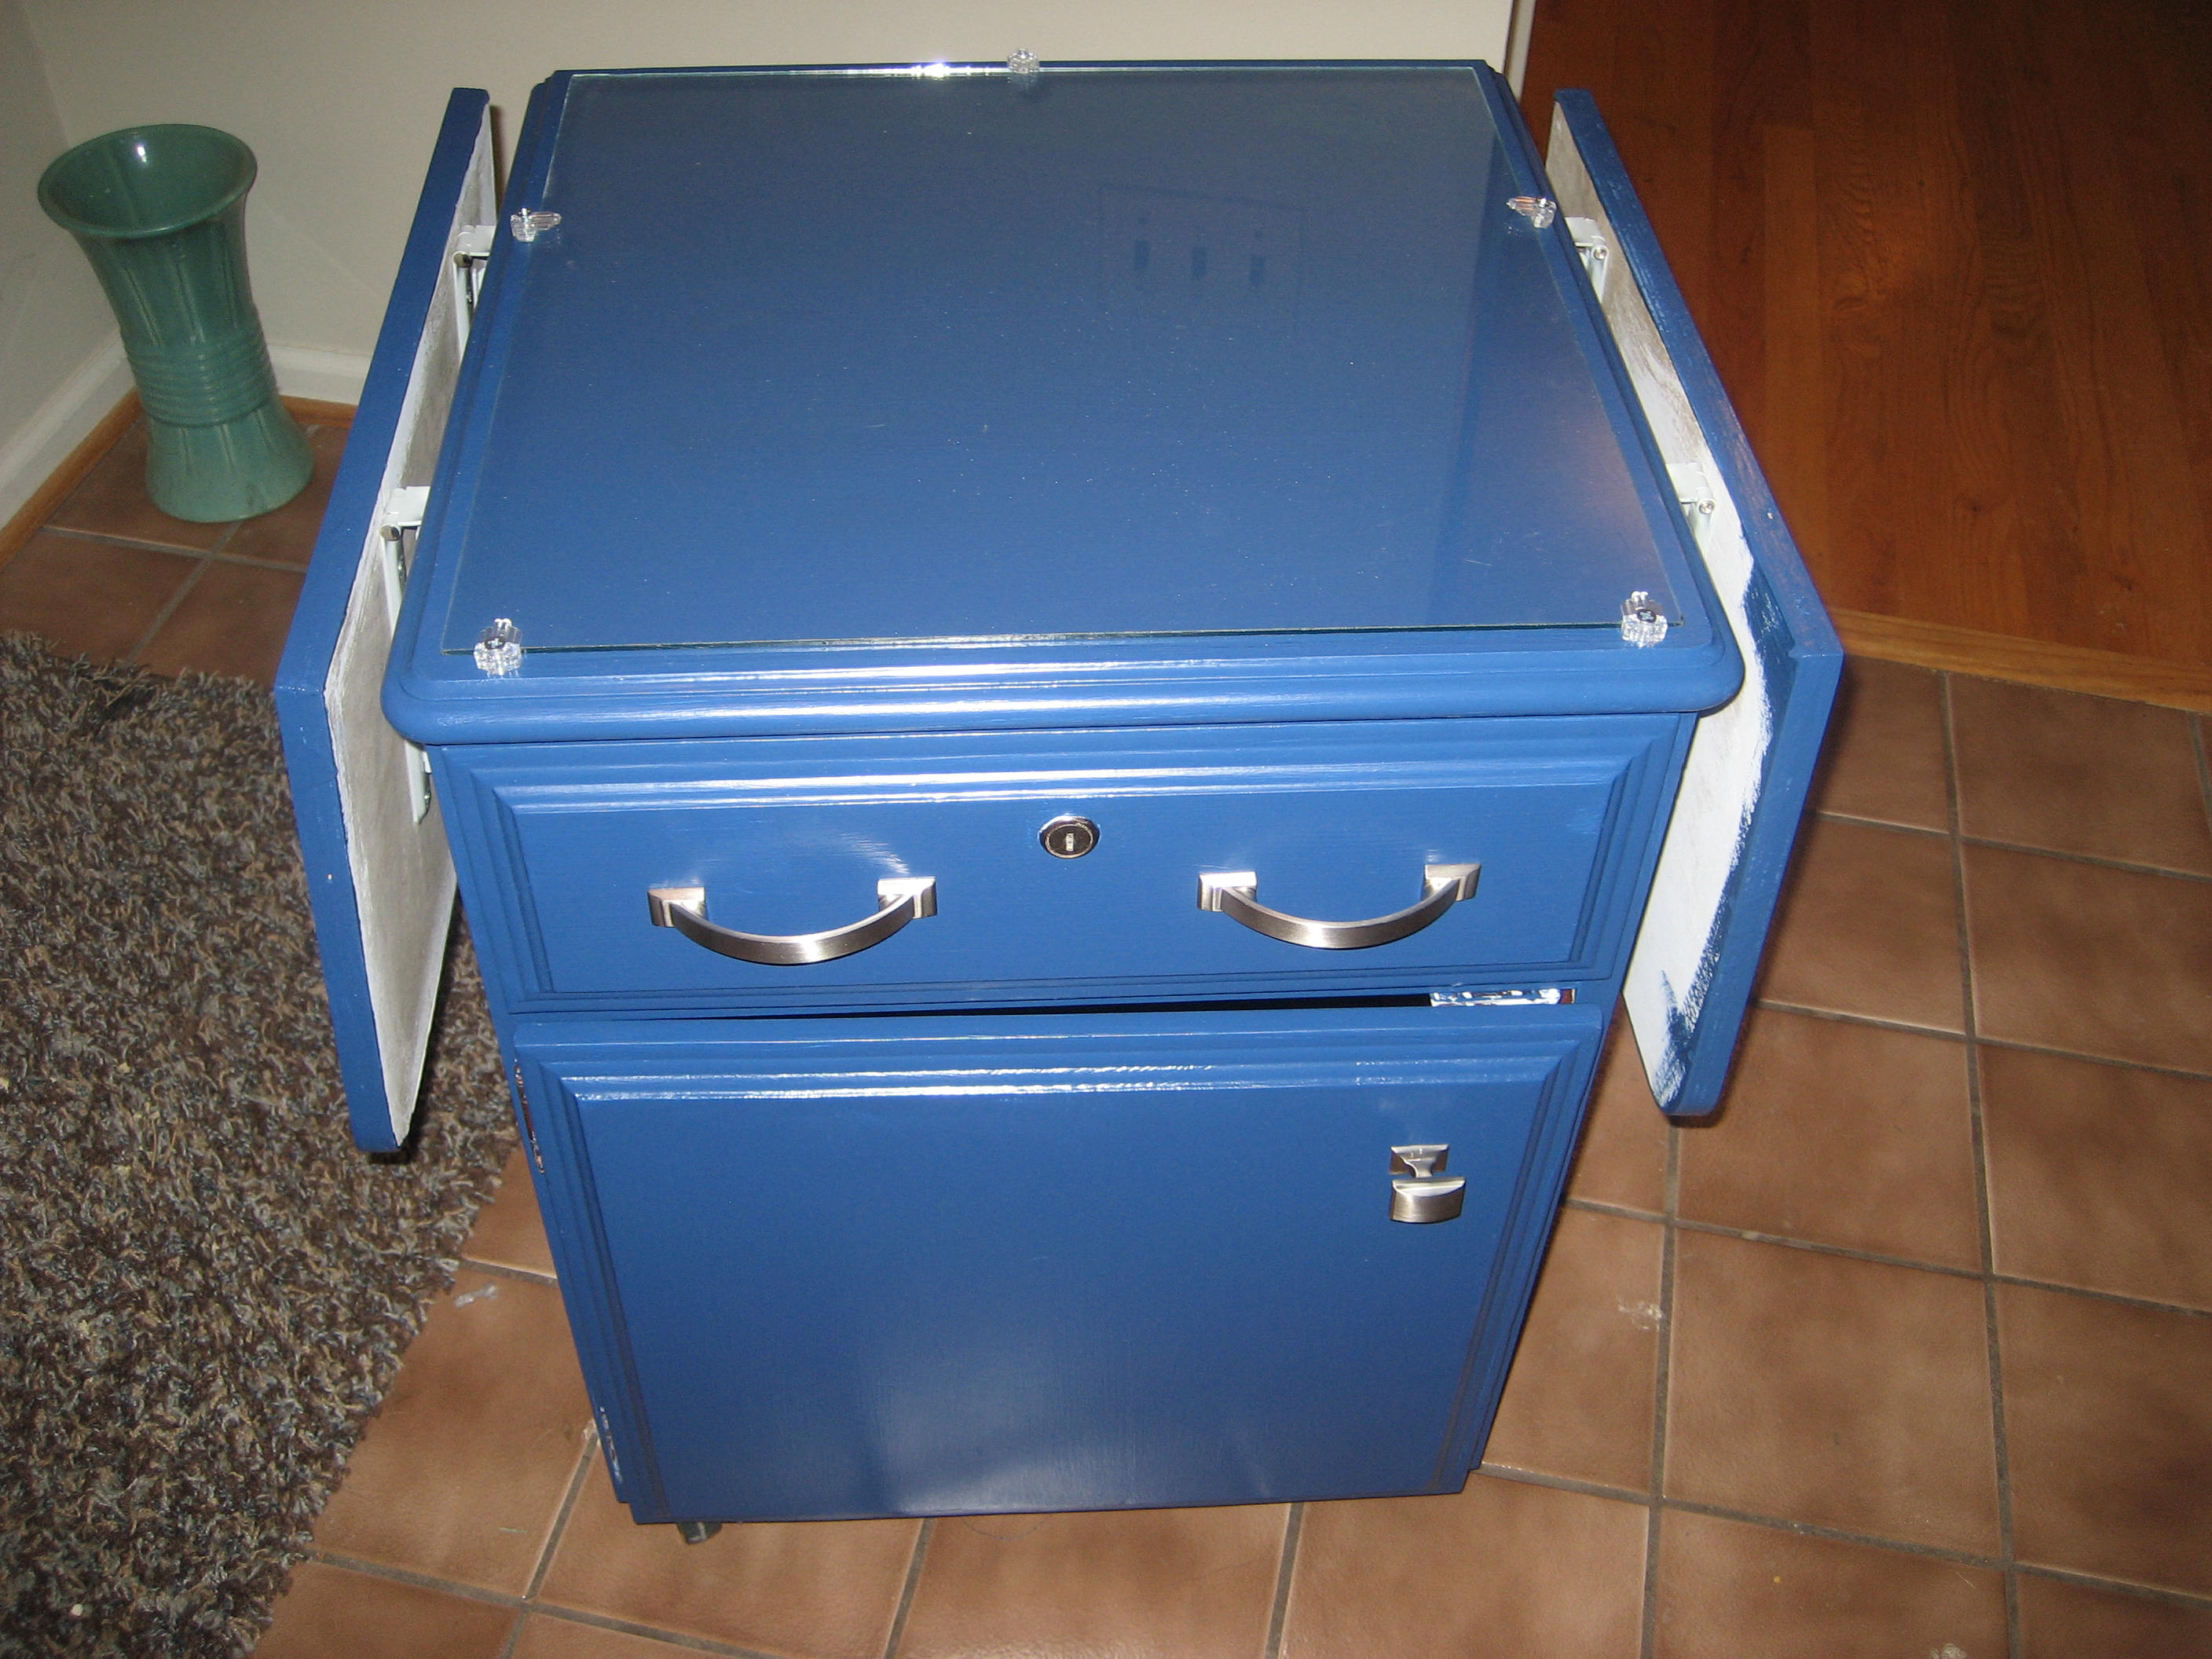
Done! And…shiny!
Here’s a pic of the finished taboret with the leaves down. Yes, I could’ve painted the underside of the leaves, but in all honesty, I kind of like that unfinished look. It’s a working space, not a piece of fine furniture. Right?
And my artist loved it :)
After Christmas, we went out shopping and picked up some plastic refrigerator bins for holding supplies, and a silverware tray for the drawer, for her brushes pencils and palette knives etc.
I told her that I expected it to be covered in paint splatters in the very near future, so she got started on that right away :)
Of course I also hope it’s a piece of furniture that she’ll use for many many years . . .
Total out of pocket costs: less than $150.
But I didn’t need to spend that much. Could’ve kept the same pulls/knob. Could’ve used paint I already had around instead of buying a new color. Could’ve used one bracket/leaf instead of two. IOW, if your budget is really tight, I think you could do something like this for $100 or less.
Dimensions when leaves are extended: 42 inches wide by 18 inches deep.
Here are some more pics. And please drop me a note or leave a comment if you have any questions — and if you riff on my idea to make your own taboret, please let me know! I’d love to hear about it and see your pictures :)
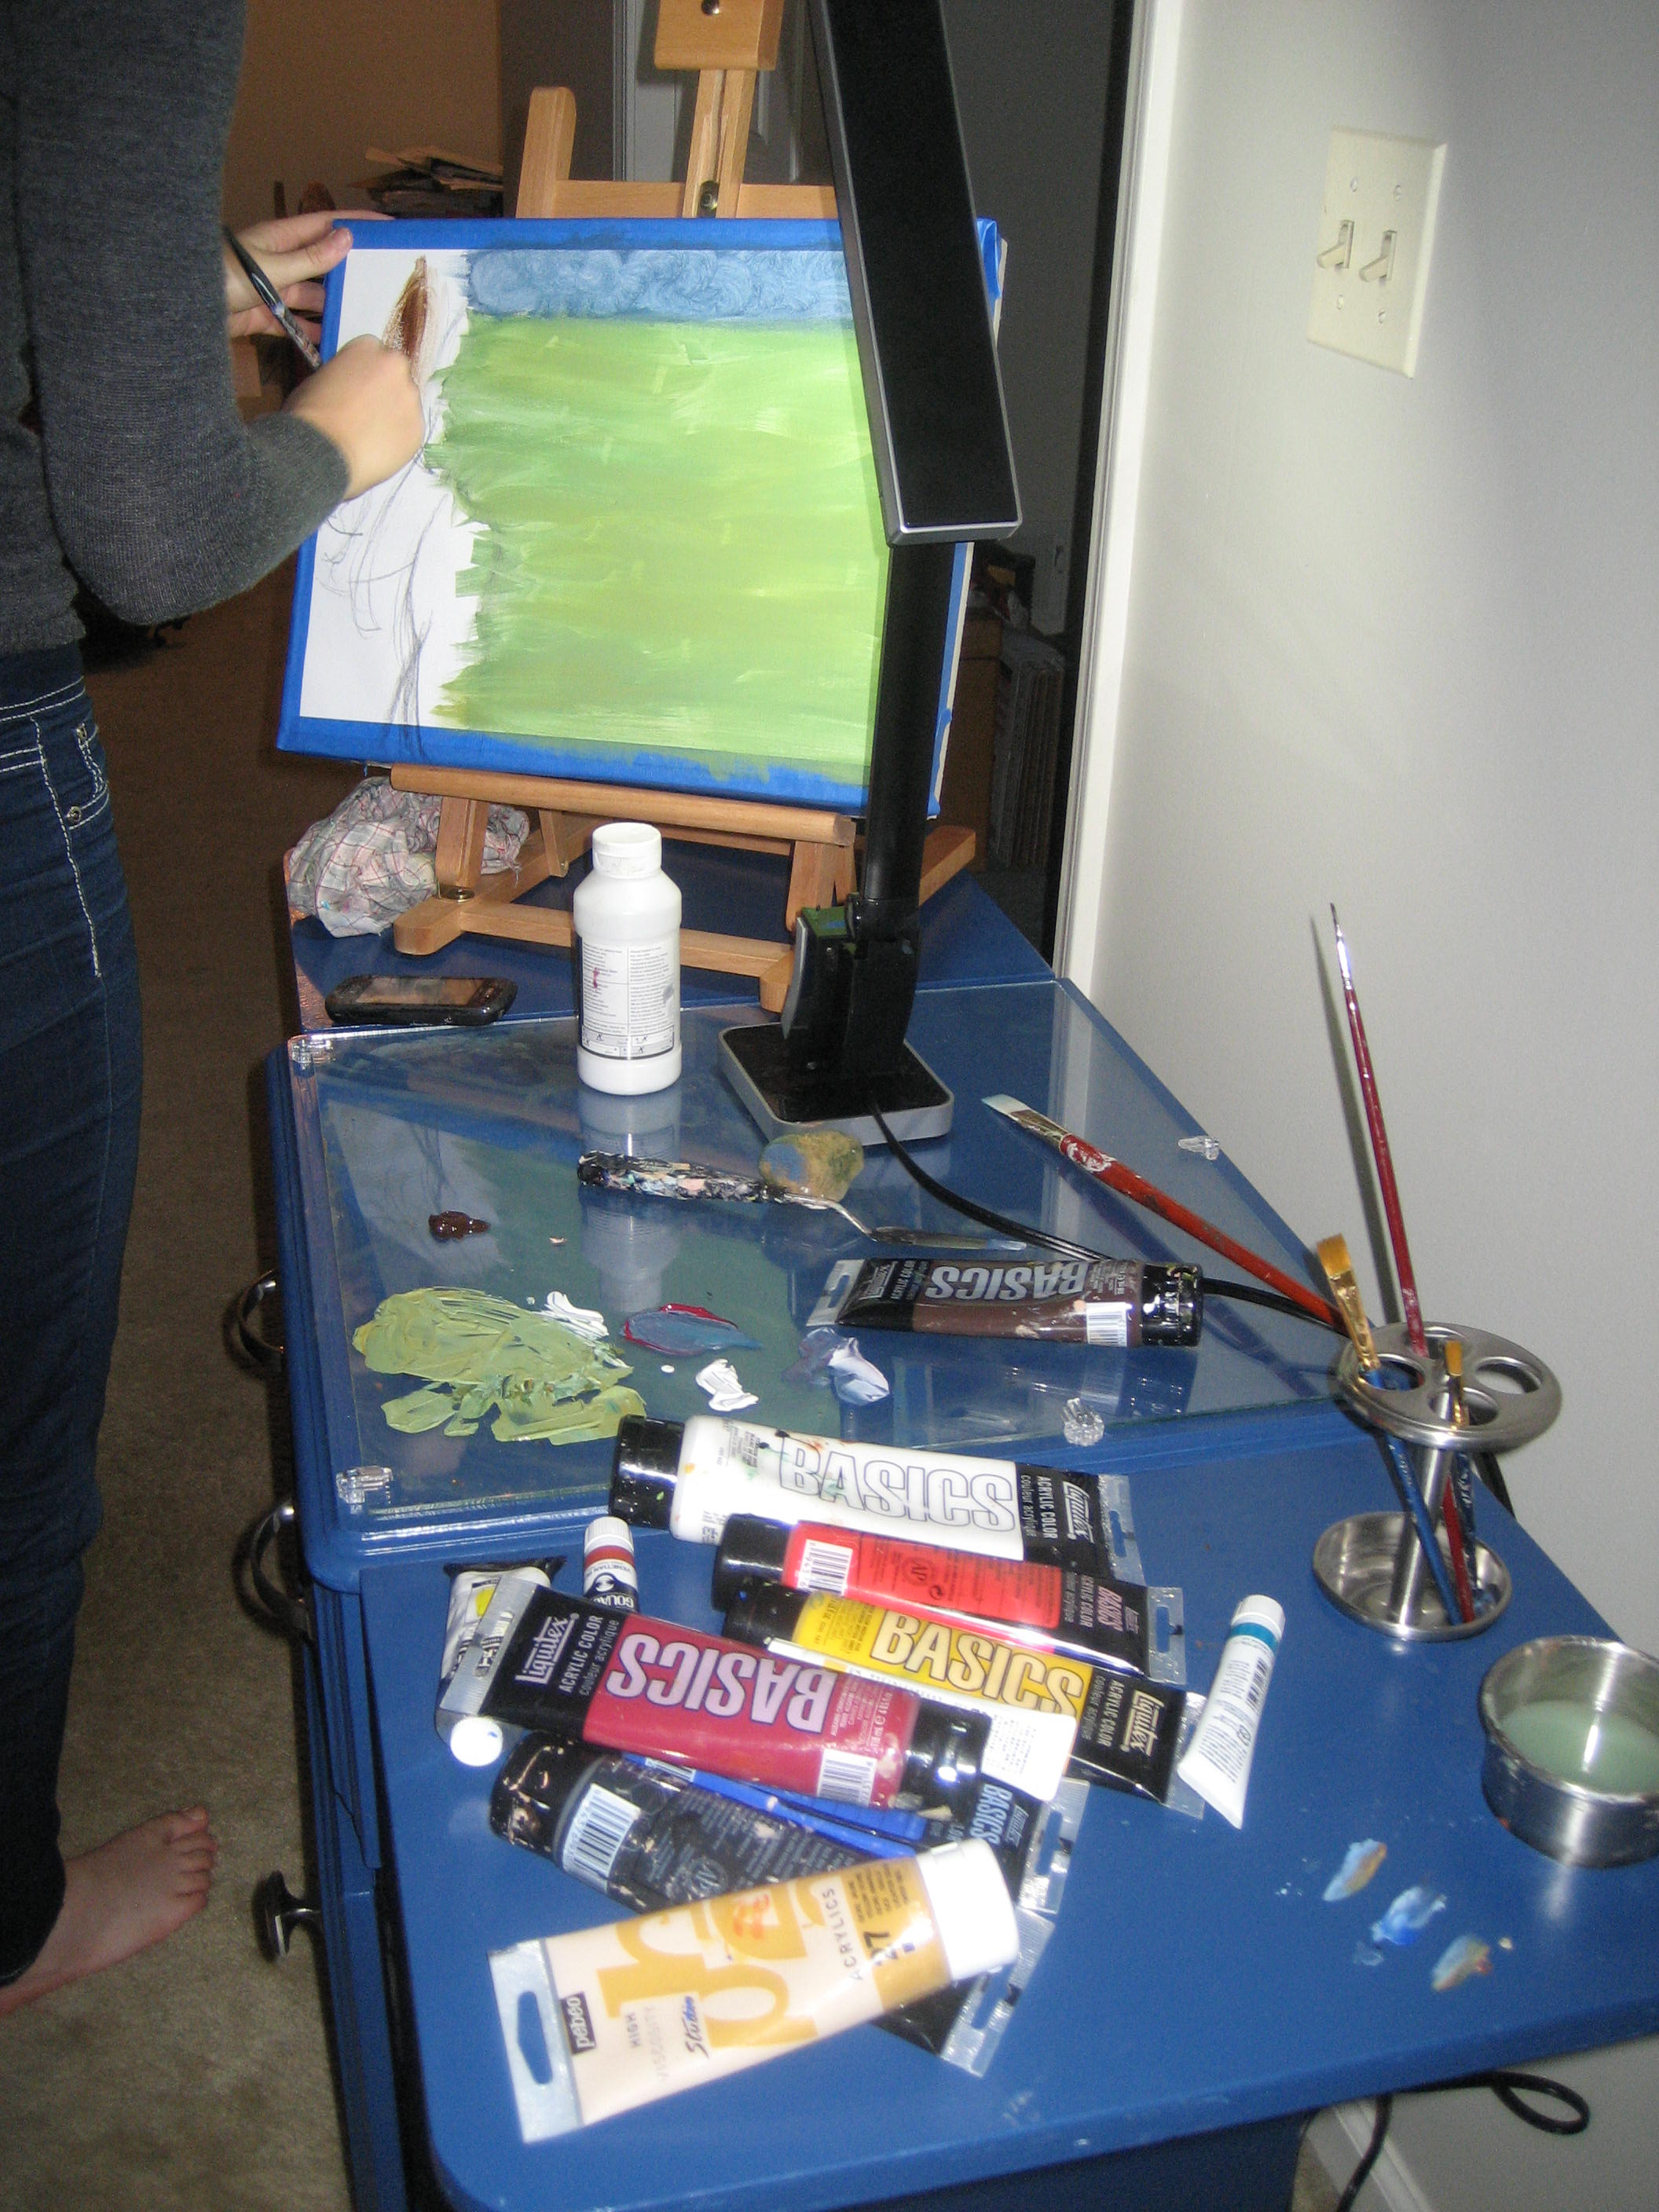
She didn’t waste any time putting it to use.
Messy is good!

Storage . . .
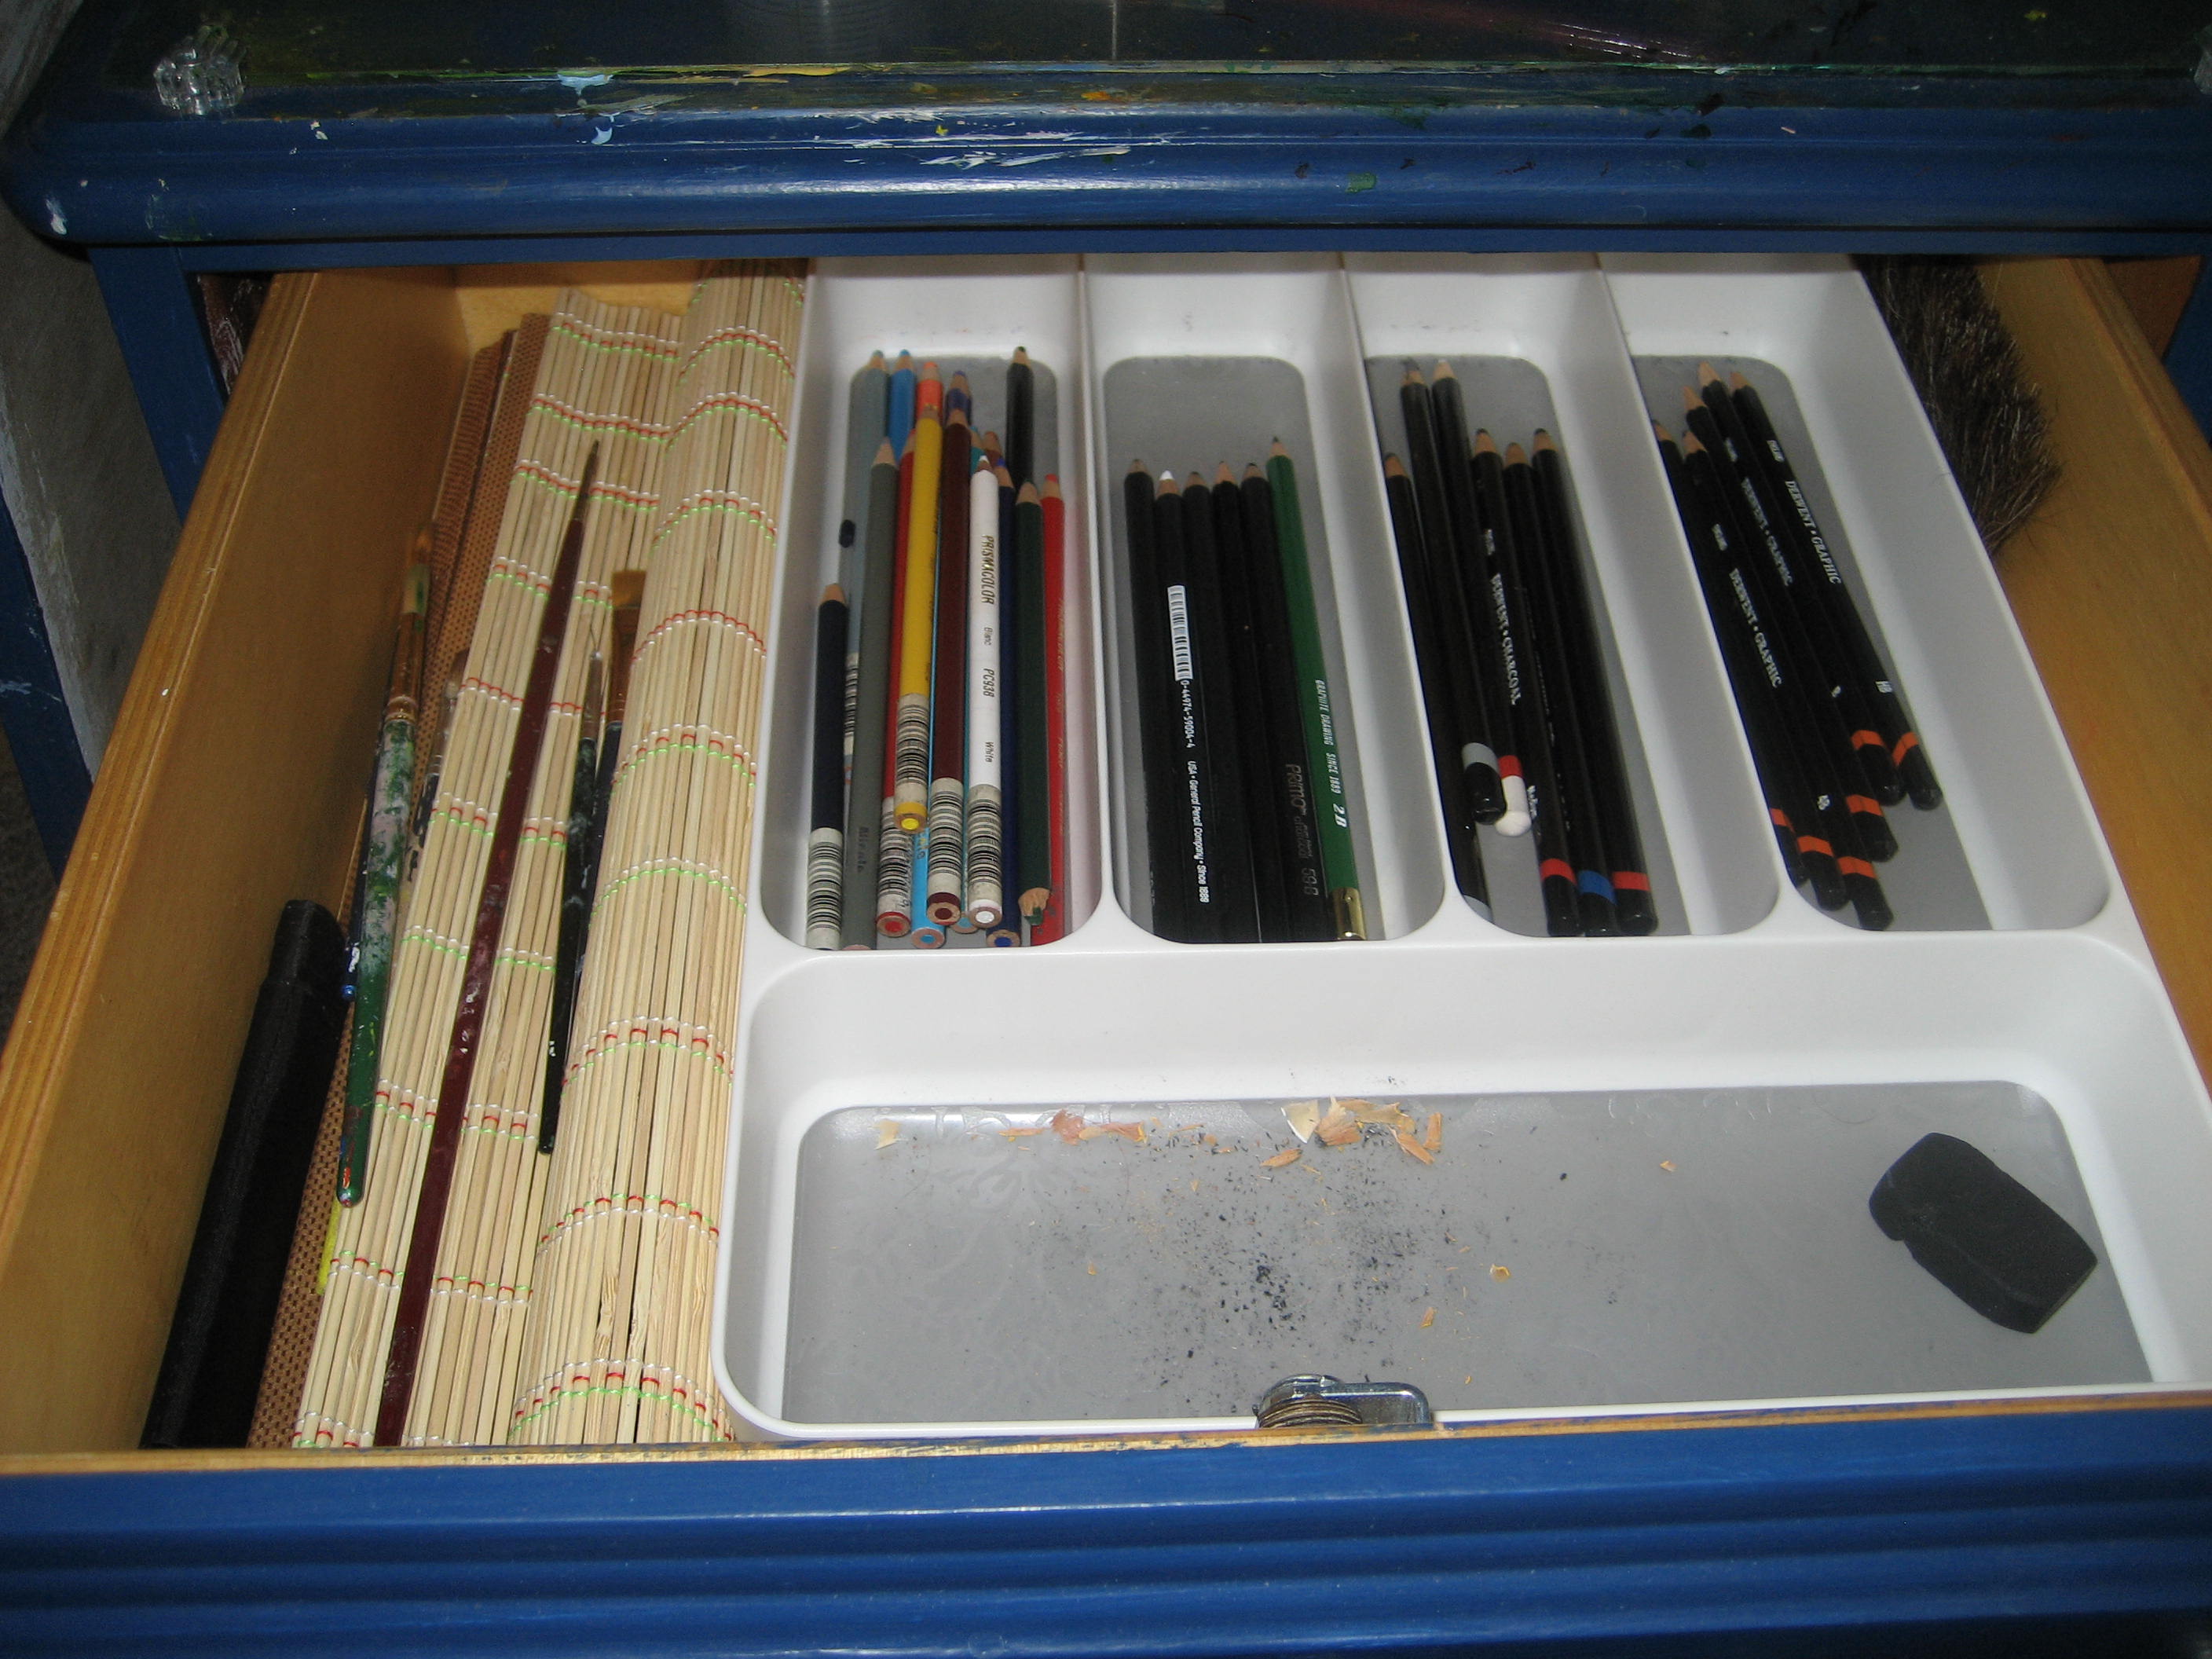
. . . and more storage.